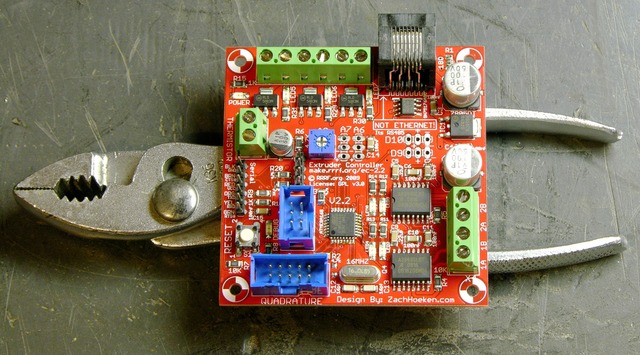
Over the last two evenings, I got my CupCake’s extruder controller assembled.
I have just a few notes below following up on solder paste, hotplate soldering, and missing and unlabeled parts.
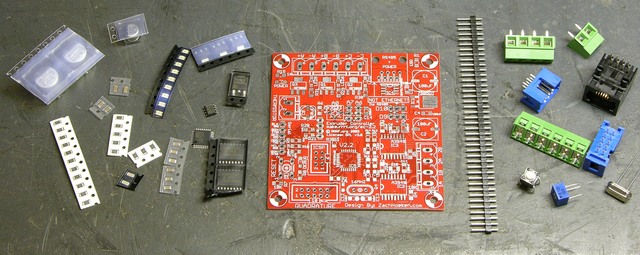
In spite of the MakerBot wiki pointing to the RepRap extruder controller v2.1 build instructions, what actually shipped is the v2.2.
The onboard ATmega168 is Arduino-compatible, and the board has MOSFETS for switching heaters and fans, H-bridges for running the extruder motor, thermistor input, and RS-485 (balanced serial communications) for talking back to the mother ship. It looks like a really flexible board — they didn’t design for the bare minimum needed to run in their system, but built it with spares and expansion and room for growth. Very nicely done.
The Right Amount of Solder Paste (Mostly)
I did a better job on the solder paste this time — I was very happy with the amount on all the 1206 components.
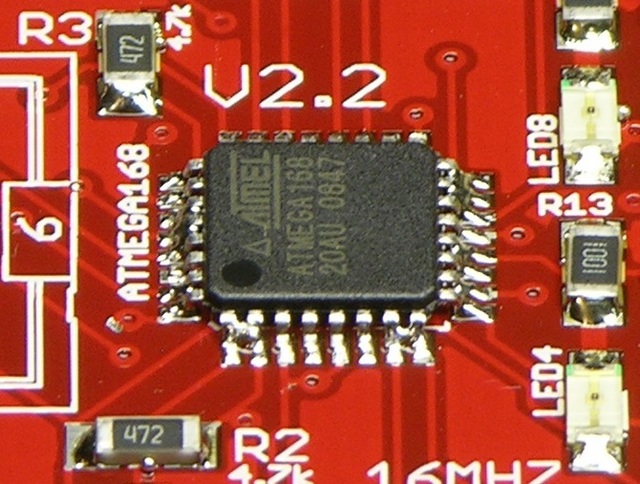
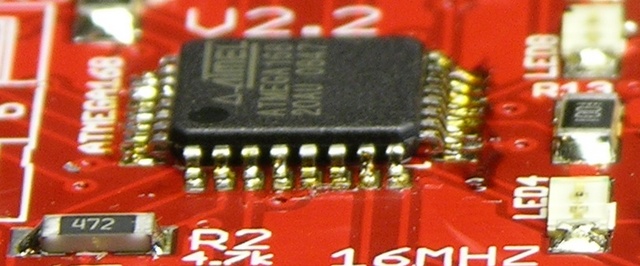
The amount on the ATmega TQFP (square in the lower center) is WAY too much, though. The pins were so small, I wasn’t doing well trying to dab onto each pin individually, so I ran a bead along each row of pads.
It was much too thick a bead — most of the pins ended up with solder bridges.
I had to come back with solder braid and wick the solder off. It cleaned the leads well, but left flux residue on the board, which I’ll need to go back and clean yet too.
When I was applying the paste, I was paranoid about missing pads and getting the board heated up and realizing I needed paste somewhere I had skipped and it being too late — which is stupid, since if I did miss pads, I’d discover them while placing the cold components and when it would still be easy to correct the omission.
At any rate, it’s really easy to find unpasted pads by tipping the board back and forth under a light and making sure that there are no remaining bright spots other than through-hole pads.
Missing and Unlabeled Parts
Unlabeled Capacitors
C3-4, 6-7, 10-11, and 14-15 are all 100nF ceramic capacitors in 1206 packages. C12-13 are 15pF in 1206, and C5-9 are .22uF in 1206.
All of these are visually identical and the parts in the kit were unlabeled, so there was no way to tell them apart other than quantity (8x 100nF, 2x 15pF, 2x .22uF). To make matters worse, my eight 100nF capacitors were shipped in a strip of six and a strip of two; so not only were the 15pF indistinguishable from the .22uF, but both of those pairs were also indistinguishable from two of the 100nF.
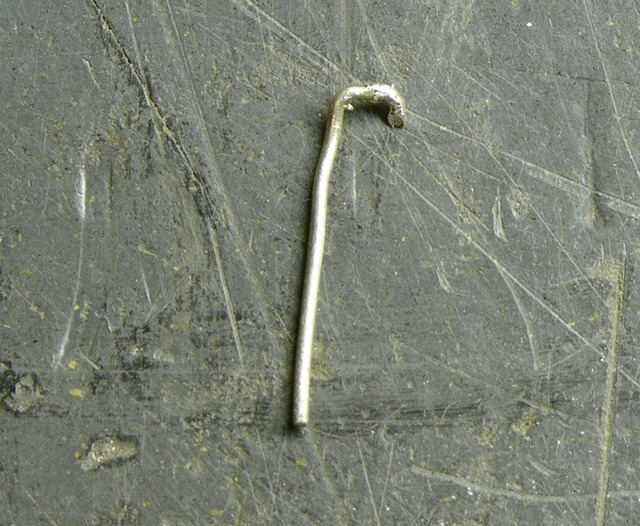
Fortunately for me, I have the SMT tweezer probe that I made a while back and a meter that measures capacitance — and you can bet I checked every last strip of capacitors in case I hadn’t even been delivered the right quantities. Unfortunately, not everyone else will have a capacitance tester; and the MakerBot crew needs to figure out how to address this problem. Maybe tape the component strips onto a sheet labeled with their values?
Missing RS-485 Termination Resistor
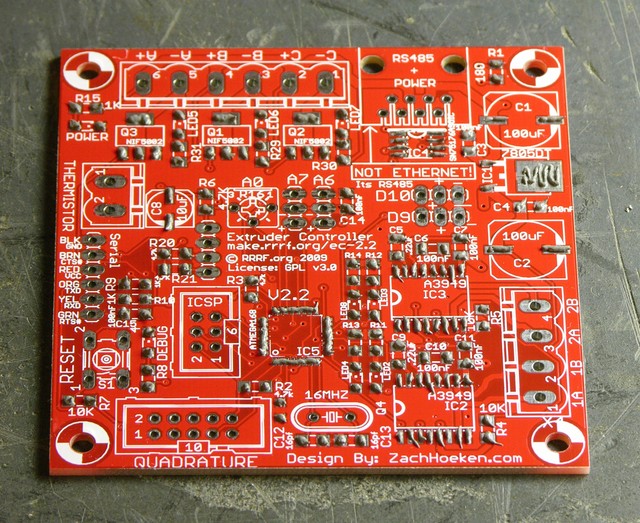
My kit was missing R1, a 180Ω resistor. The only 180Ω SMT I could find I had on hand was smaller than 1206 (0804? It’s in the far upper right of the PCB), so I wondered whether I could substitute a different value that I did have in 1206. But upon checking the schematic, I found R1 is the RS-485 termination resistor, so I figured I shouldn’t mess with its value and I used the physically small 180Ω.
I pulled it off a salvage board using my +5 Hook of Desoldering to heat both ends of the SMT at once.
The build instructions say the termination resistor is required on one extruder on the RS-485 bus, and this is the only extruder I have at the moment, so I assume it’s required. But in addition to being missing from my kit, R1 is also missing from the Bill of Materials on the wiki page, which I find a little disturbing.
Again, easy for me to work around; but probably not everyone has spare SMT parts lying around (or the knowledge that they do, or the willingness to salvage them).
Unlabeled, Unused Pads
Finally, there are two unlabeled pads near the center of the bottom of the board, right between the labels for R2 and C12; and their function isn’t clear to me. One of them runs to the ATmega, and if I’m counting pins correctly it’s a ground, so maybe it’s a ground pad to use when probing other parts of the board???
I spent a fair amount of time trying to figure out whether any of the nearby labels were for those pads and searching through the build instructions to figure out whether I was missing any more parts. It’d be helpful to have it mentioned that they don’t need to be populated (if that is indeed the case).
Left Out On Purpose
The ATmega had some pins left over, so the RepRap team (aka Zach “Hoeken” Smith) brought them out to headers on the board for expansion and hacking. (Nice!)
The assembly instructions have you populate these with male headers. I left them empty for the moment, though, so that when I decide to use them, I can decide whether I want male or female headers onboard. They’ll be easy to solder in later.
Another fine write-up. I can’t wait to see some extruding. =)
You may be able to adjust the amount of solder paste you apply by adjusting the angle you hold the tube of paste.
“My kit was missing R1, a 180Ω resistor.” => http://wiki.makerbot.com/forum/t-151695/optional-resistors
Regards,
tamberg
“unlabeled pads near the center of the bottom of the board, right between the labels for R2 and C12″ => http://wiki.makerbot.com/forum/t-151596/extruder-controller-v2-2:undocumented-capacitor
Regards,
tamberg
Brad — are you thinking closer to 90° and use the tip to squish it flat?
I figured I’d just move the tip faster relative to the rate of extrusion.
To echo your issues, I hand soldered my extruder controller last night and my experience was nearly identical to yours. I looked for the 180 ohm resistor everywhere and once I found out it was optional I left it out. Strangely, I had the exact same capacitor numbering as you (including two seperate 100n’s). I do not have a cap meter and thus tried to indentify by comparing sizes. I plan on borrowing a cap meter from a friend before powering the board up. And lastly, I too spent a ridiculous amount of time trying to figure out if the unlabeled pads were suppsoed to be populated. In the end I left them alone as I saw a pic of the controller in various places with these pads unpopulated. I have built all the other components save the motherboard, and they all went much smoother. Anyways, thanks for the write-ups as they proved useful for me (shaving off the tabs in the comm jacks was clutch).
Thomas, thanks for the pointers to other folks’ experience with these!