11-Nov-2008
Welcome, Make and Gizmodo readers! I didn’t expect this kind of attention; but you mention light sabers, I guess geeks like us are bound to get excited. ![]()
This was meant to be a crude, quick proof-of-concept prototype, and at that it succeeded. I now have 500 white SMT LEDs on the way from Hong Kong; and when they arrive, they’ll each — grain of rice sized — get glued to the end of a piece of plexi, where they’ll be nearly invisible when off. It’s up to Lisa whether the connecting wires will be visible or minimal; and bless her heart, she says she wants to incorporate visible wires into this piece, so I don’t have to mess with 1000 hair-thin, enamel-coated wires.
Finally, this is only good for artistic purposes or accent lighting. As you may have noticed when shopping for LED light-bulb replacements, there’s very little out there even close to the brightness of incandescents. If you want to light a hallway as you walk through, I’d suggest Piranha (bright) or Luxeon (brighter) LEDs in the baseboards and an ultrasonic rangefinder at the end of the hallway to determine your position.
I have the privilege of working with Lisa Rundstrom on an art installation for a show at the end of November. Lisa does amazing work with plastic (especially acrylic) and light (really, go look at her site), and we’re planning a cloud of 200+ hanging acrylic pieces, edge-lit with white LEDs, interacting with audience members.
If I don’t descend into gibbering madness from the impending deadline, the piece is going to be amazing. (If I do descend into gibbering madness, I expect that’ll be amazing too.)
Our art / technology / education collective has been meeting once a week in preparation for the show, and last night I built a little demo to give a rough idea of what controlled LEDs could look like.
A year ago, one of the teams in our art and technology class built a piece with much larger edge-lit plexiglas strips (not a great photo but the best I can find), so I had a pretty good idea what they could look like. I’ve also played around enough with microcontrollers and LED controllers that I can visualize very easily what kind of things you can do with them; but it was a little more difficult to convey in mere words to Lisa. So I wanted to put together a little something to show lit strips fleeting around in a field.
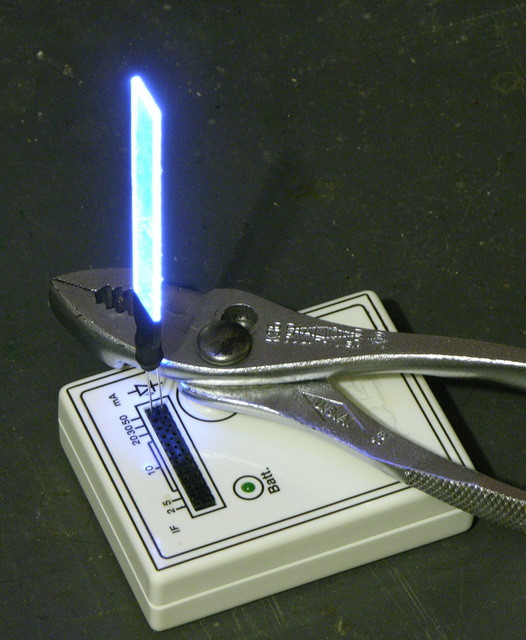
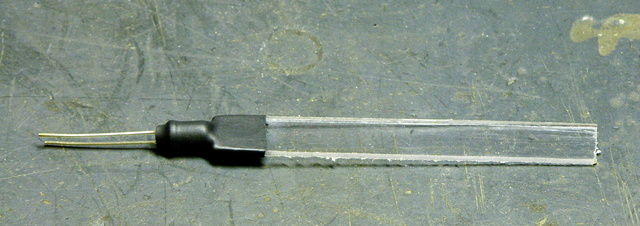
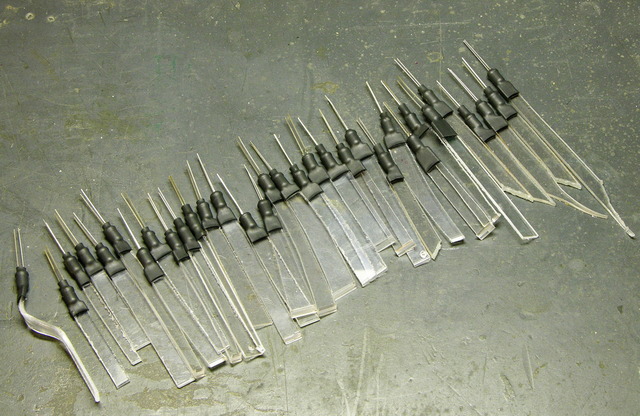
I cut some plexiglas (an odd-shaped piece I had on hand and a cracked CD cover) down into approximately 1/4″ x 2″ strips, then heatshrinked a white LED onto the end of each. (Thanks to Jonathan for playing around with them and discovering that end-lighting gives the most even illumination of the long edges.)
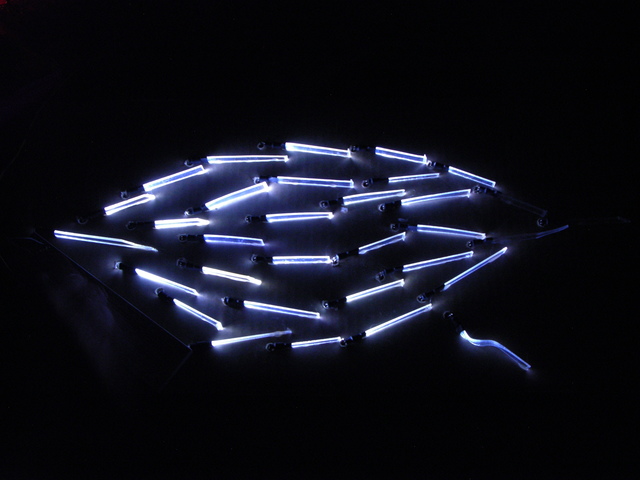
One of the strips got a little warm during the heatshrink, so I took advantage of it and really heated it up and bent a wavy shape, to test how evenly it would light.
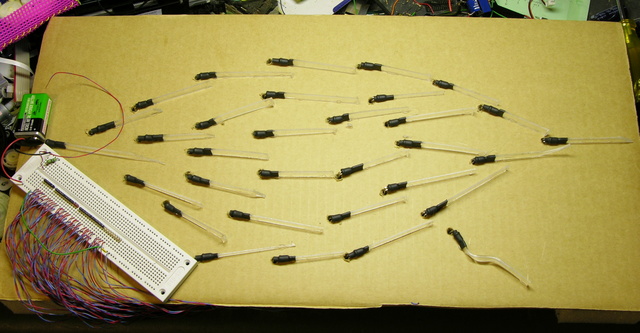
I then made a “table” out of cardboard, arranged the strips in a branching and recombining pattern, drilled holes through, poked all the LED leads down through, soldered on wires, ran the wires under the “table,” and terminated them into a breadboard. (Did I mention the part where my mind went blank and I soldered all the wires with the opposite polarity I intended, forcing me to connect the battery to the breadboard “backwards”?)
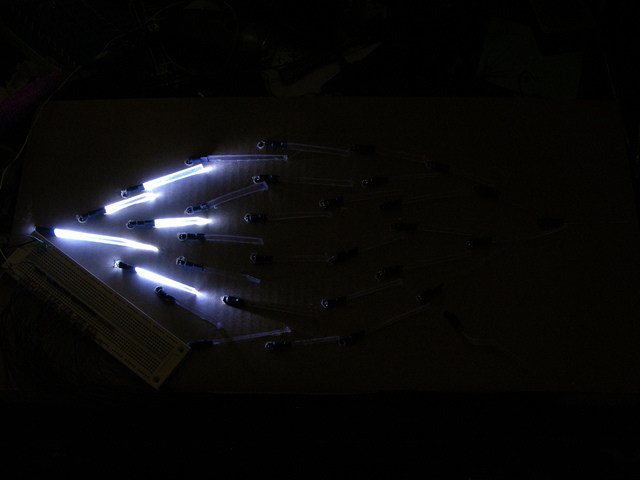
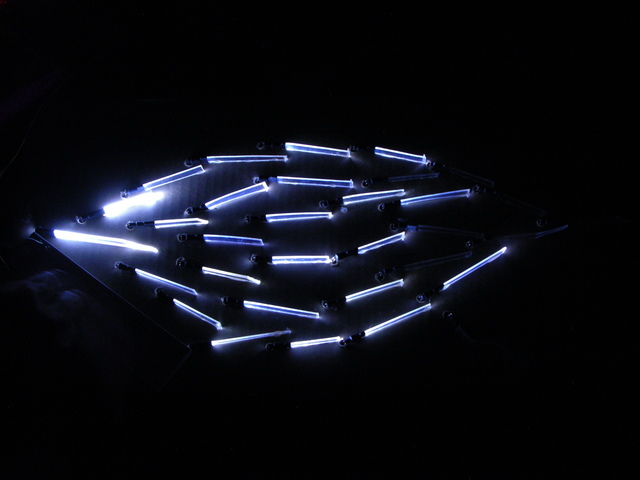
I grounded (only it became +V) the cathodes (only they were really the anodes) of all the LEDs, and jammed male .1″ headers into the breadboard in parallel with the anodes (only they were really the cathodes). I then connected a wire to the positive (ah, negative — is anyone else getting tired of this?) terminal of an 8.4V NiMH battery so you could run it back and forth along the protruding male headers. It causes the LEDs to light in a deterministic but not visually predictable sequence that moves approximately from one end of the board to the other.
Here are some time-exposure action shots. The digital camera’s bloom really overdramatizes the effect — they don’t look nearly so much like lightsabers in person, and you can make out the edges more clearly.
I took the demo along to the meeting tonight, and — crude as it was — Lisa was so excited by it that she asked if she could take it home for a week. Sweet, sweet success. ![]()
Interesting stuff. Most of the light propagates down the material via total internal reflection. We did some modeling of similar things 25 years ago or so when first working with LCDs (e.g., backlighting, via a strip of Lexan with the lamps not behind the LCD).
For some interesting effects, you might consider making some roughening on the edges where you want a bit of light to leak out. Or, try coating the surface with a material which has a refractive index between that of the plastic and air (oil?). Note that, with enough computational design, you can even build a keyboard or touch sensitive device using edge lit panels and the total internal reflection effect (Fingers cause the light to leak out/be attentuated, so it doesn’t reach a detector on the other side.).
For a really interesting effect, you might try using multiple, differently coloured LEDs, or, perhaps, a single multicoloured LED. Also, note that, since the index of refraction of some “plastics” depends upon the wavelength (e.g., dispersion), you may get differing patterns when using different colours.
Anyway, there’s more fun stuff going on there that you might first realize.
Dave
Dave, the edges are all rough-cut from a bandsaw, no sanding except on a couple of them. Interestingly, some of the most even visual effects (not discernible in the photos) are when the bottom edge is rough and the top edge is smooth.
Really nice
Hi, firstly thank you. Cool blog entry and a nice effect. Secondly, I was hoping you might be able to give me some details of the microcontroller set up you used.
I’m trying to create an LED display with 25 independently programmable sections, with up to 8 LEDs in each (all 8 being on or off together).
I know what I want to do, and I’m not afraid of getting dirty with the wiring, but the programmable bit I’m lost on.
Any advice anyone could provide on a simple (/simplest) way to achieve this would be greatfully appreciated.
Thanks
Damien, as I noted in passing, this demo has no microcontroller, just male headers sticking out of the breadboard that you run a wire along to light the LEDs. However, I just bought a batch of Allegro A6276 16-bit LED drivers, and I’ll be controlling them with an Arduino in the final piece.
The A6276 is rated for 90mA per segment, if I’m remembering correctly, and I think you can use a higher drive voltage and run multiple LEDs in series. I might look at doing four parallel strings of two series LEDs at 20mA per string, 80mA total.
You can daisy-chain the A6276, so two chips would get you your 25 segments plus a few spares you could use for indicator lights or whatever else.
I hope you’ll come back and post a pointer to your work when you get this thing going!
There are a couple of approaches to driving such a light system. If you really need programmability, the usual approach is to use some type of microcontroller. Microchip makes the PIC series, and Atmel makes the AVR series, both of which are fine microcontrollers. Of course, you are responsible for building a board to install the microcontroller on and for programming it. A variation on this approach would be to use something like an Arduino:
http://www.makershed.com/SearchResults.asp?Cat=43
(which, if I’m not mistaken, is based on a AVR microcontroller).
One of the tricks to minimize cost is to use a smaller microcontroller (e.g., one of the 8 pin ones), and use a shift register to actually drive the LEDs.
You could, of course, use a PC to drive the system, probably building some type of latch based system that’s operated via a parallel port (e.g., a handful of 74LS374s), but that would, almost certainly, be overkill.
If you don’t require programmability, but only want to “randomly” sequence the LEDs, then you may be interested in a LFSR (Linear Feedback Shift Register) PRNG (Pseudo Random Number Generator):
http://en.wikipedia.org/wiki/LFSR
You can build one of these with a clock generator (e.g., NE555 chip), a TTL shift register (or two, or three, or ….), and an 7486 XOR gate.
Dave
Keith -
Just curious how bright the LEDs are that you are using (in candela or mcd)?
How about the SMT LEDs, also?
I tried a quick experiment of my own on broken shards of CD jewel case and even discounting the camera bloom, the lighting effect was not very noticeable. I was trying to figure out what was different with my experiment. I think the LEDs in my quick test were 630 mcd.
We used to use clear perspex sheets mounted in a wooden box with a strip light inside it over maps in the command bunker when I was in the Army in the 80′s/90′s. When the map was annotated with Chinagraph pens, the notes used to light up.
No photos though, for the obvious reason, sorry.
Would it be possible using this method to edge light a piece of Plexi with IR LEDs, and have the edge of the plexi roughed up, an air gap of several inches, and then 4 or 5 IR detectors on the other side? I’m thinking of using a method like this as a finish line sensor for a model track. Would the IR illumination be enough? Thanks!
Alton, I have no idea — you’d have to try it and see. I don’t even know whether plexiglas is transparent to IR.
Why would you want to use the plexi? Why not just have the IR LEDs pointing directly at the detectors?
What are the implications to the world of signage with this?