A while back, I bought a secondhand Liebert GXT2-2000RT120 uninterruptible power supply (UPS) on eBay. The GXT2 is a series of online UPSes, meaning that the output power always comes from the inverters off the battery bank; it doesn’t switch from utility power to battery power like an offline UPS. Besides eliminating any possible switchover glitches, online UPSes always deliver conditioned power at a constant voltage. The 2000RT120 is a 2000VA unit with 120V output — large enough to power all my servers for a good little while.
The batteries were due for replacement and the seller removed them to save on shipping costs. I got a UPS with a set of wires and no instructions on how to connect them.
Also one of the wires was compromised … but since it appears to be a ground wire, I figured no big deal if it shorts out against the cage. KIDDING!
Yesterday I figured out the wiring, installed batteries, and got the UPS set up in my server rack.
Batteries
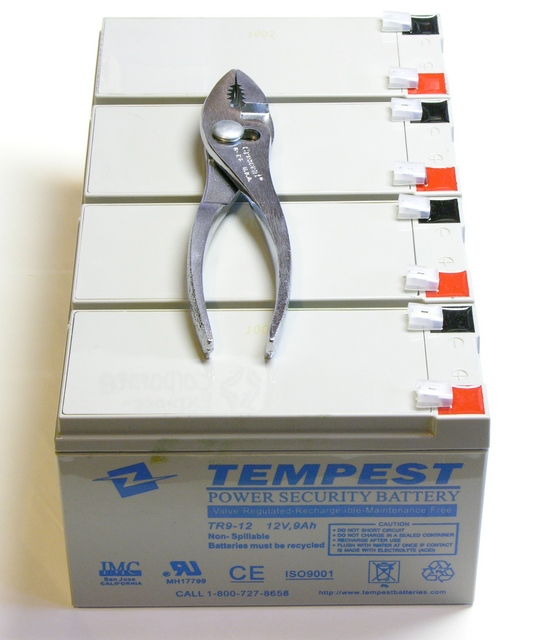
I’ve bought replacement UPS batteries from Digi-Key before, measuring the size I needed and using their parametric search to find sealed lead-acid batteries with the same size and highest capacity. Digi-Key’s replacements for the Liebert UPS seemed a bit pricey this time, though. Using the power of Google, I found a set of replacement batteries from BatterySpec for only $72 plus about $20 shipping.
They processed my order quickly — I ordered after the close of business on a Friday night, they shipped Monday afternoon, and my package was waiting for me Friday when I got home.
At first I thought they had provided fully-insulated battery terminals that I’d have to disassemble to connect the fully-insulated spade terminals on my UPS wiring, but those are just insulating caps for shipping.
Battery Wiring
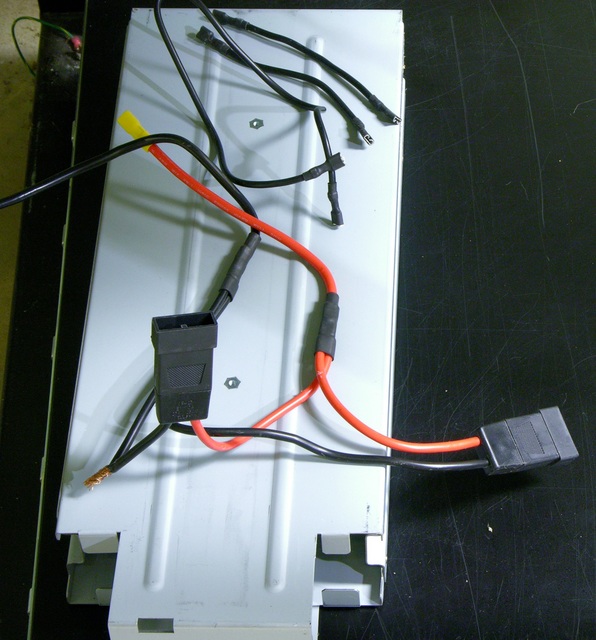
The first thing I did was repair the ground wire. The wiring harness is a bit odd — it uses two connectors, I assume for current-carrying capacity — but that makes it easy to see how long the ground wire should have been. I stretched everything out and the remaining three wires were all in agreement about how long the cut wire should be.
The original wires are very supple 10-gauge with relatively fine strands. The closest thing I had was stranded 10-gauge left over from an electrical install; it’s not as supple, but it’ll do. I cut it to fit, lap-soldered the connections, and covered them with a double dose of heatshrink tubing.
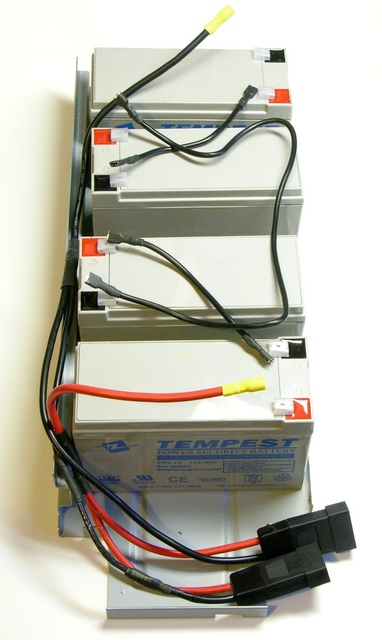
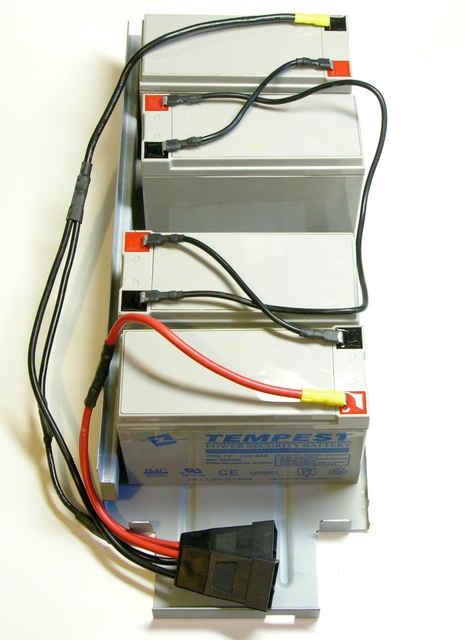
The next order of business was figuring out how to wire this up, and the wires themselves provided the clues. The two sockets are wired in parallel with each other, so they had to connect at the ends of whatever parallel-series chain the batteries might form. The wires didn’t include any Y cables besides the sockets, so the batteries apparently needed to be connected in a single 48V series chain.
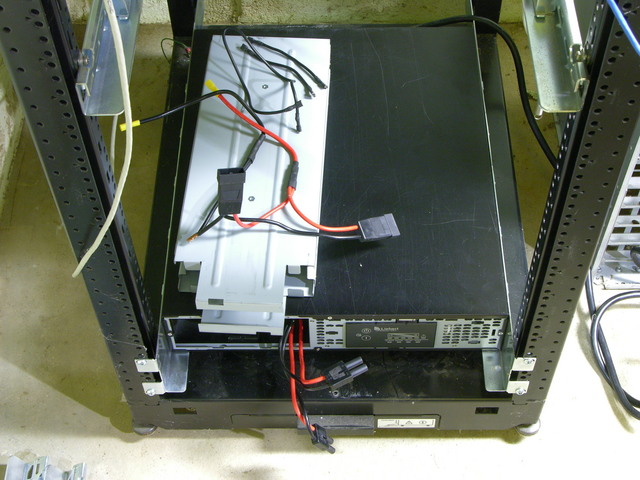
The cage is sized for the batteries to be laid down on edge, but it was easier to figure out the wiring with the batteries standing up. The socketed cables were long enough and had bends in them for the positive connector to reach between the nearest two batteries and the negative connector to reach between the furthest two.
Everything else fell into place like assembling a jigsaw puzzle without looking at the box — the batteries will tip together in pairs with their terminals at opposite edges of the cage, the short wires connect the two end pairs into series chains, and the long wire connects the two chains.
I connected all the wires with the batteries still upright, stopping before the last couple of connections to test carefully with the voltmeter and make sure I hadn’t overlooked anything that was going to short out.
With this much current available, any short circuit would cause a lot of heat very quickly; so knowing I wouldn’t be able to unplug red-hot wires, I had a wirecutter handy in case of extreme emergency. Fortunately it wasn’t needed and everything went together as expected. I measured just over 48V at the sockets from red to black, so all looked well.
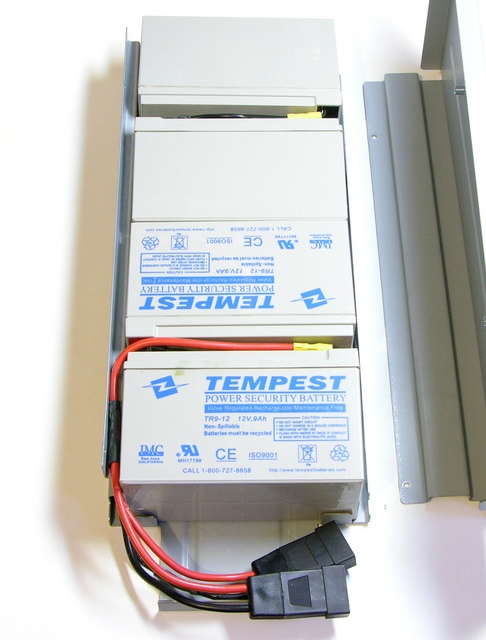
I laid the batteries down and tucked the wires away into the grooves at the sides of the cage. I don’t know how it was done originally, but I had to route the black wire through the bottom race and the red through the top in order to be able to close the cage.
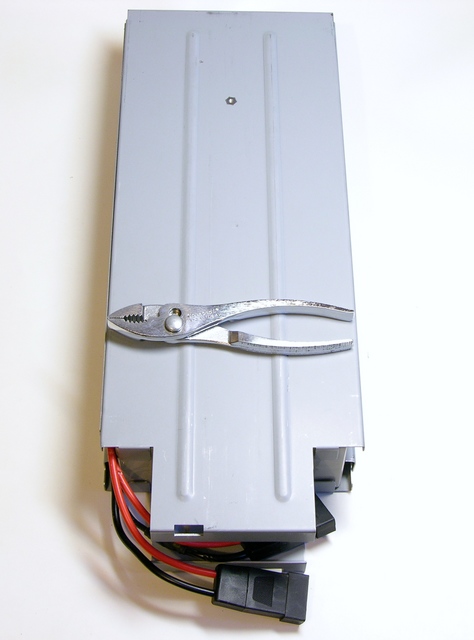
All back together and buttoned up.
You can see a nick in a red wire’s insulation, but it doesn’t go through to copper. Because it’s above the Y in the cable, it would have required cutting and resoldering the cable to cover with heatshrink. I didn’t think that was worth the effort, and I don’t put much stock in electrical tape. I guess I could go back and cover it with a larger heatshrink that encloses both of the red wires together.
Reinstalling
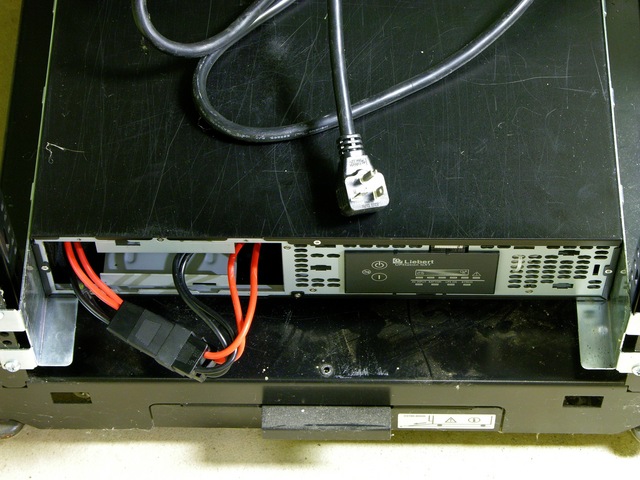
The battery cage slid perfectly into the bay.
Connecting it for the first time was a bit unnerving — what if the seller was less than honest and took the UPS out of service because of a severe malfunction? Seeing no evidence of fire or overheating in the battery cage or bay and trusting Liebert to engineer adequate safety systems into their UPS, I took the plunge and connected the cables.
The wires did not immediately get warm. Good so far.
The next order of business (and the next unnerving step) was to plug the UPS into AC power.
Wait …
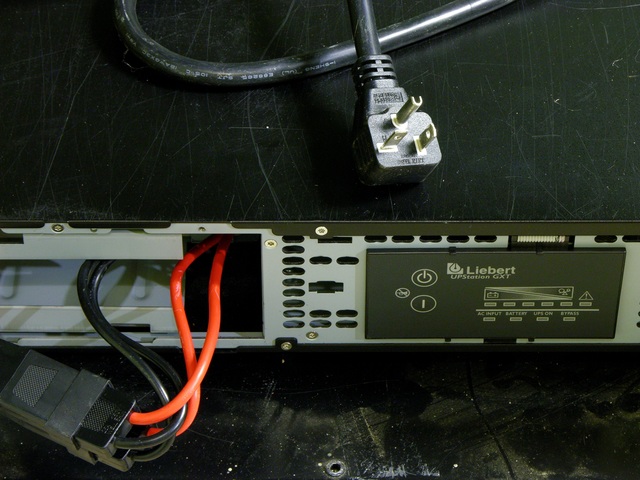
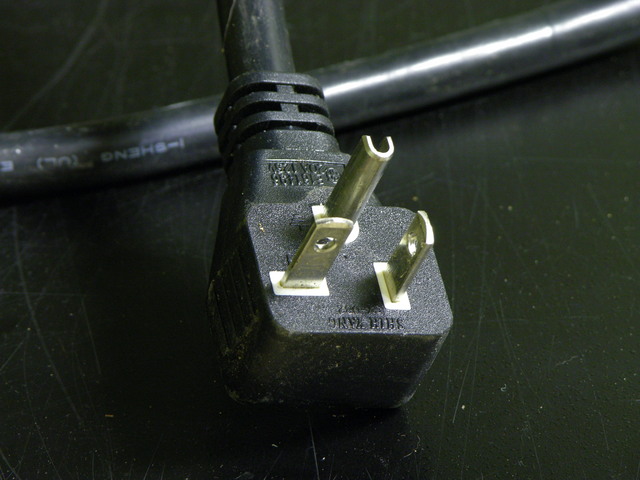
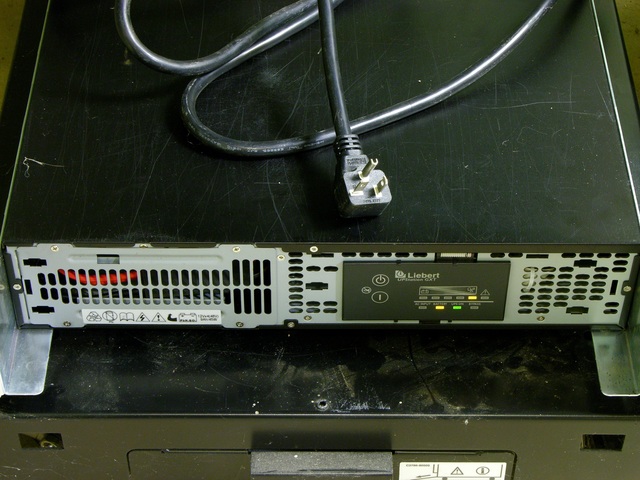
That’s a 5-20P 20A plug. I don’t have any 5-20R receptacles in my basement.
DRAT.
By fiddling with the pushbuttons on the panel, I somehow got the UPS to turn on while on battery power and the indicator lights looked okay. I had to reference the manual to figure out how to turn it off — press the Standby button twice for about a second each time.
Next Steps
Well, I already want to get an electrician in to run a new service entrance and install a new master breaker box. For now I’ll probably just do something inadvisable with an extension cord.
The seller didn’t include the plastic front bezel, and I’d really like to find one.
Cut off the plug, and stick on a new one?
Hi Keith,
Thanks for the post, I’ve learned a lot about fixing consumer electronics from you.
5-20R receptacle:
Whats the harm in just replacing this cord with another 3 pronged cable with the correct gauge wire? As long as you are sure that your receptacle has the correct polarity, is correctly grounded, and that the Romex run / breaker will support an additional 20A@125V, whats the concern? If you met all of the above needs on the receptacle service, why not just change the receptacle plate to a 5-20R, or change the cable pigtail to a standard 5-20 one and use the existing outlet?
you are obviously knowledgeable about this, what concern am I overlooking?
Thanks,
Adam
Adam, I think you’re asking two questions: Why not put a 5-15P plug on the UPS and why not put a 5-20R recep in my basement. Both good questions that require additional information to answer.
First, regarding changing the cable or plug on the UPS: the heavy-gauge cable with the molded 5-20P plug is integral to the UPS, and it’s really beautifully made, and I don’t want to chop it to put an ugly plug on the end. I’d have to open the UPS, find where it connects inside, and replace that cord with another. That doesn’t feel worth the effort right now.
Second, about changing the recep to a 5-20R: the circuit in my basement is definitely 15A, not 20A; it’s an old house. Right now I’m confident that the UPS will draw less than 20A, because I know what load I’m putting on it, I don’t have external battery bays connect to recharge in parallel, and the batteries should recharge at .9A * 4 = 3.6A total @ 12V = 43.2W which at 120V = .36A. So I’m comfortable running the UPS on a 15A circuit, but I wouldn’t want to mislead anyone by putting a 20A recep on the 15A circuit.
The real fix is to get a new master breaker panel installed.
I see, so its more of a philosophical debate than an electrical one. I understand not wanting to take a knife to “pretty” things. I’m also a big fan of fixing things “right” the first time.
I understand the risk of putting a 20A receptacle on a 15A circuit.
How about a 15A, _fused/breakered_ interstitial 5-20R to 5-15P “cheater cable” ? Seems like a safe, _cheap_ alternative to getting a new breaker panel… I have a 100+ year old house too, I’m sure the money could be spent somewhere else
The cheater cable I made is downstream of a 15A (actually maybe 10A) breakered power strip.
Ahh ha, way ahead of me…
Oh, also I’m sure it’s equally improper to put a 5-15P cord on a 20A appliance as it is to put a 5-20R recep on a 15A circuit.
You didn’t really think I was going to sit around with a brand new UPS collecting dust, did you???
No, I guess not I just wanted your input on best practices and when it was ok to break which rules…
I couldn’t help myself and looked up that the input power was 1400W max, that’s 11.7A @ 120V. I’m sure most of that is in-rush and max charge power, you also have (4) 5-20 “T-Slot,” which I assume are just (4) 5-20R’s. So, it looks as if, if all 4 outlets had a full 20A load, and the UPS was fully charging, you would be drawing 4*20A+11.7A=91.7A! I know that will rarely happen in practice, but….
How can they wire (4) 20A sockets over (1) 20A plug, there must be an internal 20A fuse/breaker on the UPS mains?
Agreed; they doubtless limit the aggregate current.
Still, the design makes sense. Say you wanted to power a single 15A load — you’d be quite annoyed if you couldn’t put more than 5A on each of the UPS’s receps.
Yes, quite annoyed indeed.
I bet it lets you “steal” transient load capacity from the battery banks…
Looks like a really nice unit. If you ever crack this bad boy open, be sure and take pictures. I’d love to see the electronics.
I have a similar UPS rated at 1200 VA. It also has 4 batteries but they are in a series/parallel arrangement for 24V.
Its batteries were also shot. I used two large marine deep-cycle batteries. I figure about 60 amps at full load!
Routinely, the UPS powers the network gear and the all-important tankless gas hot water heater In the event of a long power outage, I can also plug in the furnace to keep the chill off for a day or two. So far, it’s been a great preventive measure – haven’t had an outage since I put it in last fall
Adam: Online units like this know exactly how much power they’re putting out, and can electronically limit themselves to certain amounts of power for specific amounts of time. If a unit like this starts to overload, it’ll first start squealing at you, then cut over to an internal bypass, at which point it’s up to the main panel breaker to trip if there’s really too much power going through. On a dead short, they’ll just switch off entirely to protect themselves and whatever poor creature might be chewing on to the wires.
Keith: Call the Emerson folks at 1-800-222-5877 ext 1. They used to send out replacement panels from their returns depot a couple years ago, no questions asked. There’s a GXT3 out now, though, so covers might be a little harder to come by.
Keith, thanks for such a nice explanation on how to replace the Batteries of a GXT2-2000RT120.
I’d have a question that you might be able to help me answer…
I just purchased 6 additional GXT2-2000RT120 UPS’ at an auction and was wondering if I can plug them all together and have 6minute of battery backup times the amount of units (so 6 unit * 6minute of backup time = 36minutes of battery).
Thanks!
Steve, it’s possible you could chain them; but they’re not designed to work that way and you’d lose efficiency to the repeated DC/AC/DC/AC conversions.
If you have multiple small loads you want to power, you’d probably be better off putting each load onto a separate UPS for longer runtime.
Steve,
I had bought 4 used GXT-1000VA and got lazy when testing the last one and plugged it into the back of 1 GXT that was already being powered from the wall plug. This popped a fuse inside the unit (one not plugged into the wall) I opened the cover and replaced the fuse, then before replacing the cover I powered the GXT from a wall plug and a nice blue flamed fire started for a few seconds completely frying the rest of the ups.
So in short, besides being inefficient, it can be dangerous. There is a chance that I received a bum unit but it did work before I brought it to the office.
It would be interesting to know if Daisy-Chaining this type of UPS works.
Chris.
These units have a port for daisy chaining battery-only expansion cases to increase the run time, no need to daisy chain ups to ups through the power outlets, just add an external battery cabinet. At 50% load the internal battery is rated for 14 minutes. With one battery cabinet it jumps up to 42 minutes. With 4 battery cabinets at 50% load its rated for a nice cool 210 minutes. My units are ready for batteries as well. Thanks for the link to reasonable replacements.
Recently stumbled on this:
http://www.ebay.com/itm/Furman-ADP-1520B-Adapter-Cord-20-Amp-Socket-to-15-Amp-Plug-w-Internal-Breaker-/300855702419?pt=US_Pro_Audio_Parts_Accessories&hash=item460c65b393
I thought I’d but it here.