Filament De-Dusting for the MakerBot CupCake [from 2013 Draft]

June 22nd, 2018 by Keith Neufeld

I’ve just found this post I had started drafting in December 2013 and hadn’t finished. The remarks about reliability and long periods of disuse are still pertinent — this was one month before the last time I attempted to use it — as is the dust solution.

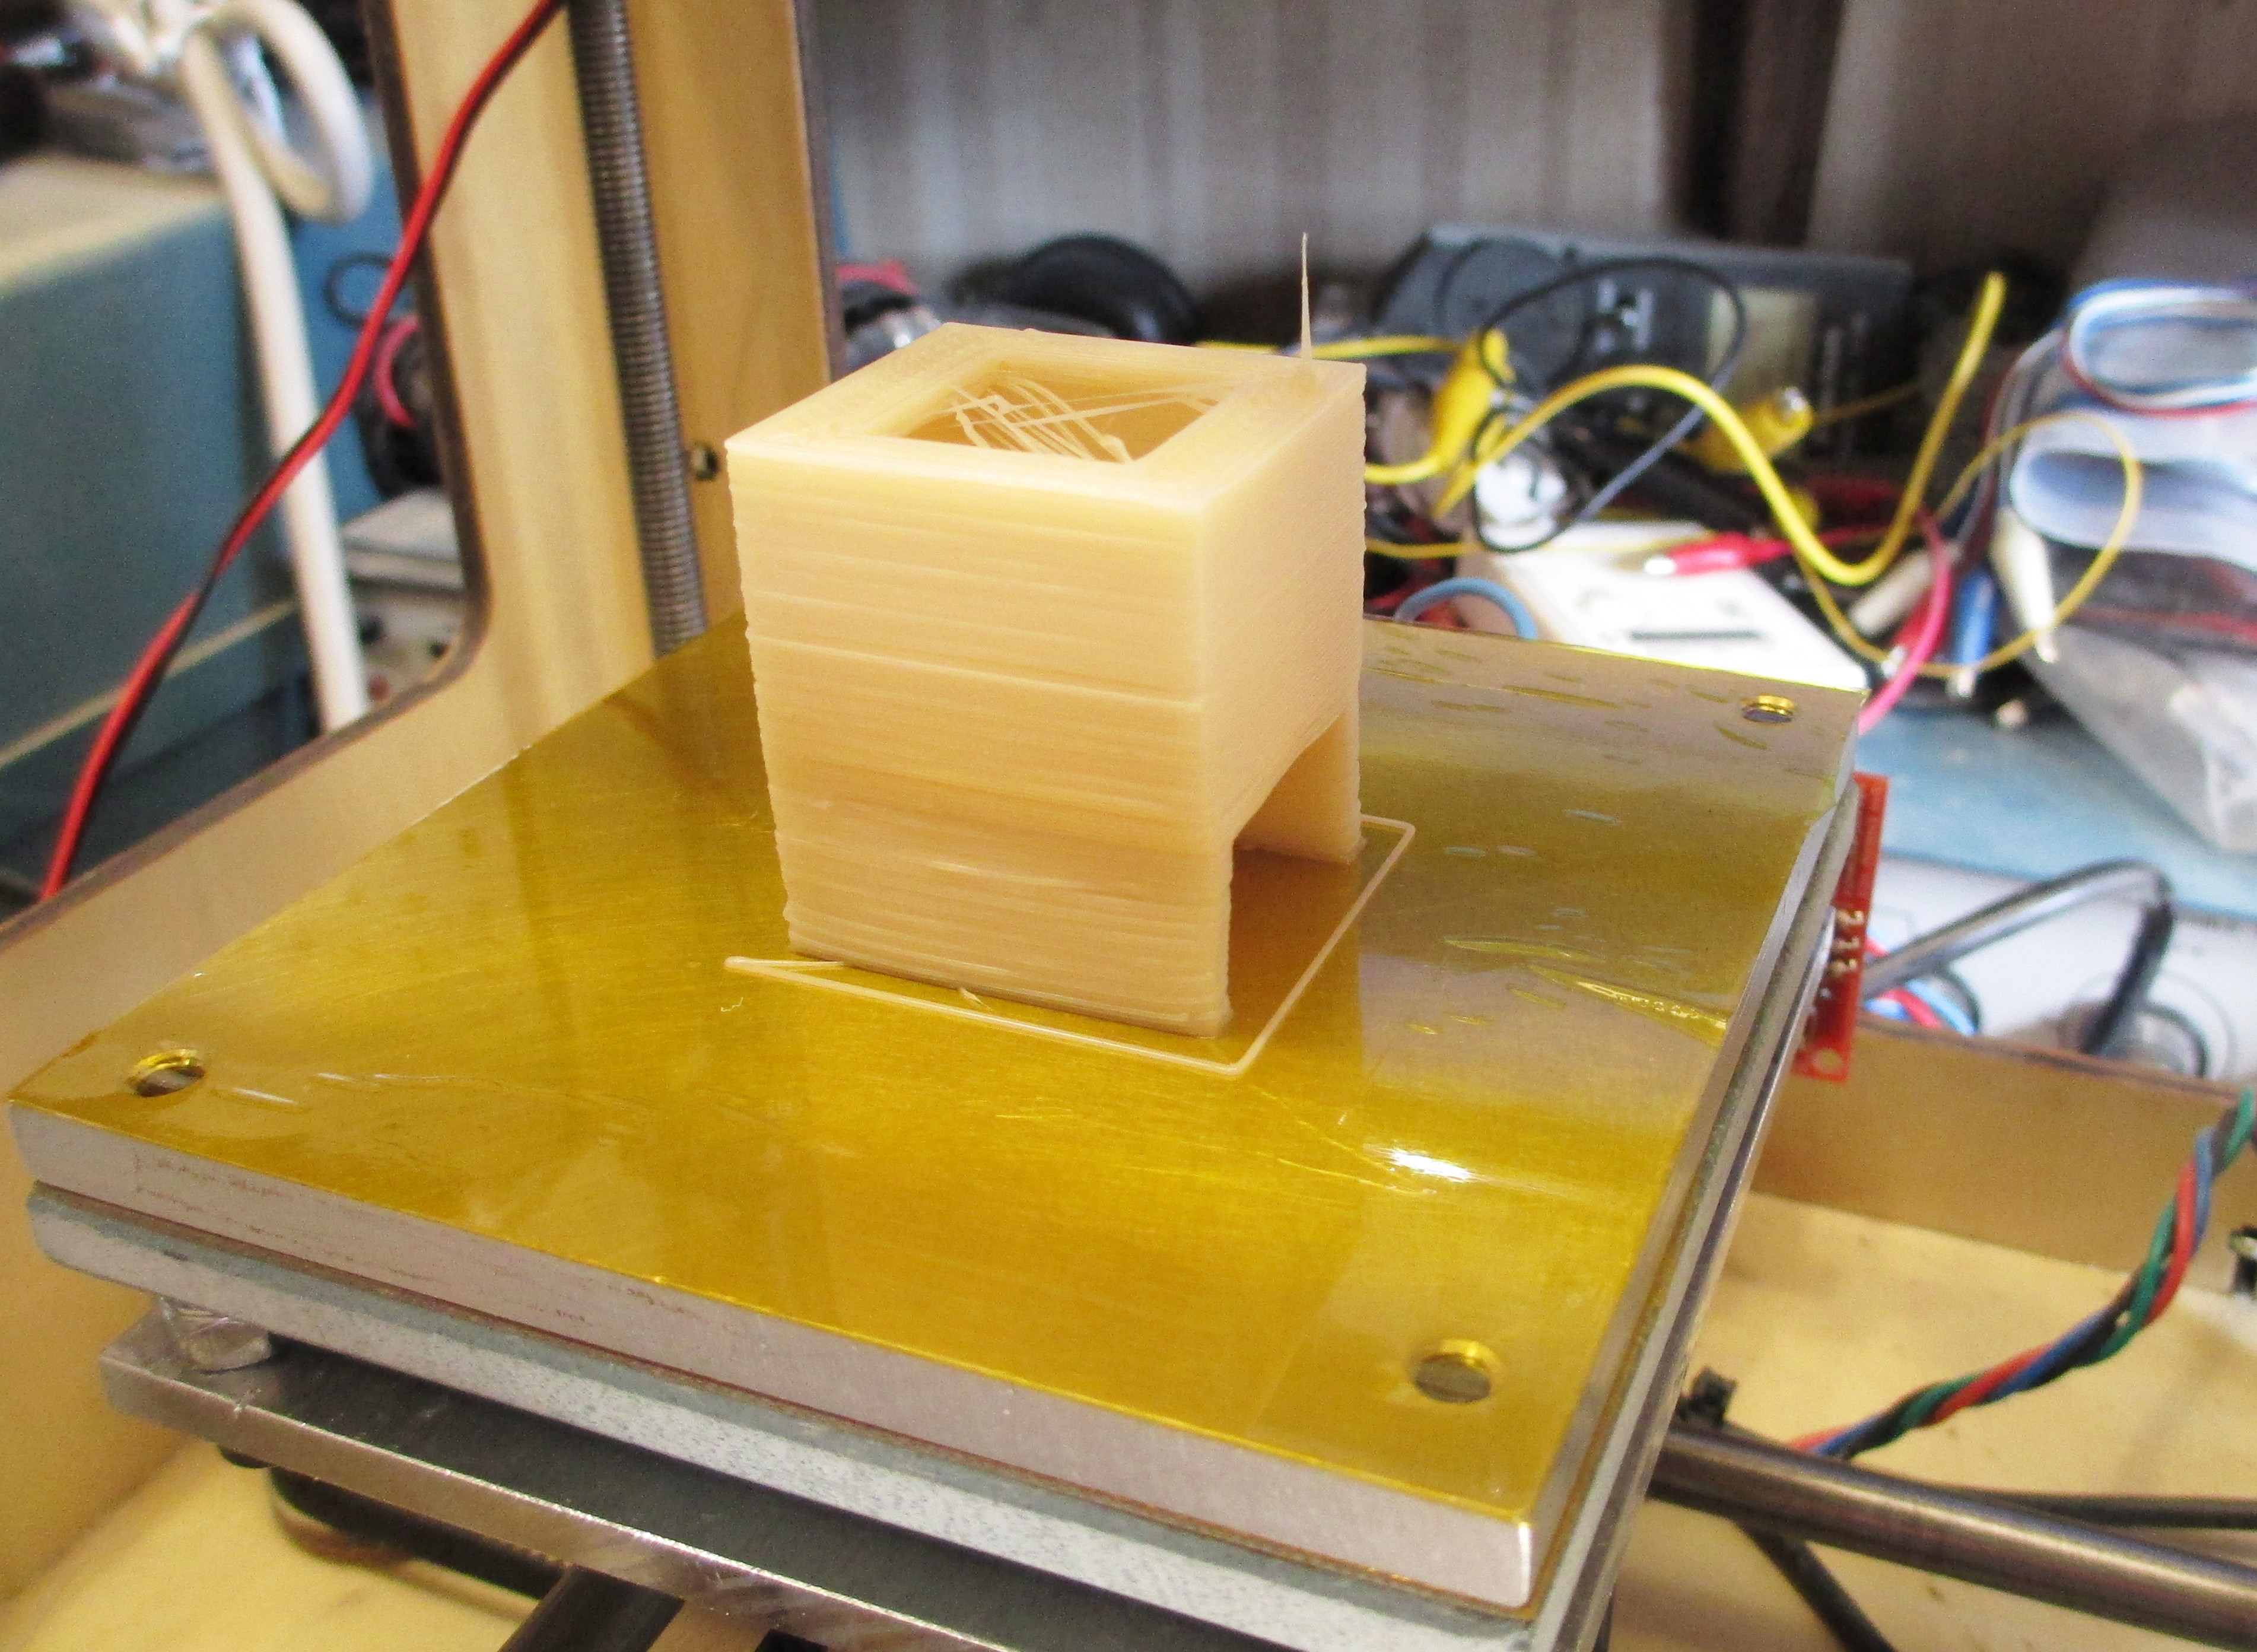
In the four and a half years I’ve owned my MakerBot CupCake 3D printer, I’ve never had it working well enough to use for more than a week or two at a time. My real frustration has been a lack of understanding what has failed and how to fix it, so much so that it’s been almost two years since I most recently gave up and put it away. [Written in December 2013, and I haven't used it since January 2014.] I know there are newer, more reliable printers on the market; but it sure seems like it should be possible to get the CupCake to work reliably, if I’m willing to upgrade critical parts.

In the intervening time [meaning 2011 to 2013], my friend Joel has run some prints for me on his Thing-O-Matic. Recently while chatting over a print in progress and checking whether the filament was jammed (solution: his build platform’s aluminum heat spreader was bolted tightly around all the edges, expanding when hot, bulging up in the middle progressively over an afternoon of attempted printing, and blocking the nozzle which was enough to jam things up), he mentioned that his nozzle had jammed to the point that he couldn’t even push filament through by hand with pliers (yes, my problem exactly) and that he had solved it (oh???).

Dust.

Joel had disassembled his extruder and lightly drilled most of the filament out of his clogged nozzle with an undersized bit, as I had in the past; then soaked out the rest of the plastic with acetone, as I had also. But when removing the clogged filament, Joel noticed it was quite dirty and made the mental connection with dust on the filament. When he reassembled, he added a toothbrush to wipe dust off the filament on its way in and has also made a point to keep his supply bagged and/or boxed. Since then (and until the expanding heat spreader), he’s had no further troubles with clogging.

This is not a new issue, but I had never heard anyone indicate it had so completely jammed their nozzles that their extruder wouldn’t extrude.

And it fixed my CupCake. Mostly. For a while.

Filament-wiping sponge holder, freshly printed

Read the rest of this entry »

New Tray for Fischertechnik Computing Box

June 18th, 2018 by Keith Neufeld

My weekend’s entertainment was making this wooden tray to hold the parts from an Apple ][ era engineering construction toy.

Read the rest of this entry »

I’m Not Dead Yet

June 18th, 2018 by Keith Neufeld

I see I haven’t posted for three years. Well.

I started this blog to share what I was working on with a handful of close friends, rather than email the same thing to each. I don’t recall that commercial blog hosting was prevalent at the time like it is now; I was at a different place in my career and finances were tighter; and I already had my own domain and ran my own server; so I just set up WordPress at home. In the basement. On my DSL connection. Where it still is.

The WordPress software uploaded the fact that I was blogging and I started getting picked up by Google. I did a few projects of interest and got a few more readers than I expected.

For a while, I had a generous arrangement to host my image files elsewhere, offloading that bandwidth from my home broadband; but that came to an end a while back. The combination of increased bandwidth requirements (making ultra-slow load times) and an increasingly busy schedule has meant no posting for quite a while.

I’ve been looking into migrating the blog to commercial hosting and Ed Nisley has generously shared information about his hosting service and their capabilities, which sounds like just what I need. I’m hoping to get that migration underway sometime soon … which might mean inside the next three years.

Meanwhile, maybe I’ll do some posting again. Images will be horribly slow to load; but anyone who wants to read can read and anyone who doesn’t is under no obligation.

Howdy.

Filimin — Back My Friend John’s Kickstarter!

May 5th, 2015 by Keith Neufeld

Filimin is a lamp that turns colors when you touch it and uses a cloud service to synchronize colors with its “group” of lamps anywhere in the world that has WiFi. John Harrison invented it last Christmas as a way for his family to maintain emotional contact across the continent and beyond — touch the lamp and it lights up in a new color to let your family see that you’re thinking of them before it eventually fades to black again.

I’ve already backed the project but it’s only 30% of the way to its $50,000 goal with 15 days to go. If it sounds interesting to you, too, please check it out, back the project, and help ensure that I end up getting my set. :-)

Modifying a Tower SG90 Servo for Continuous Rotation with Potentiometer Position Sensing, Part 1: Investigation and Continuous Rotation

January 6th, 2015 by Keith Neufeld

A common strategy in the world of hobby robotics is to modify a servo for continuous rotation to use to drive the wheels of a tabletop robot.

Tower SG90 Servo in hand for scale

On its own, the servo takes power, ground, and a position input and moves the shaft within a range of rotation to match the angle requested on its input wire. It has one or more stops in its gearbox to prevent it from rotating past the end of its range; these need to be removed. It also has a potentiometer as part of its positioning system, which — for the usual modification — needs to be tricked into thinking it’s always centered. The modified servo then runs at full speed forward or backward trying to reach a requested position and thinking it has never succeeded in doing so; and the controller requires extra, external rotation sensing if you want to detect what the servo has actually done so far.

I wanted something a little different — PWM H-bridge control of the servo’s motor for variable speed forward and backward and access to the potentiometer to detect position (crudely and at low speed) and count wheel rotations (acceptably and at high speed). This is actually an easier modification — but, though I’m surely not the first to do it, I’ve not run across it before. I started last night.

Read the rest of this entry »

DE0-Nano FPGA Learning Challenge Begins November 1

October 16th, 2014 by Keith Neufeld

I’ve been busy enough that I haven’t done much tinkering or blogging lately, but I’m preparing to use the power of peer pressure to change that.

I’ve been interested in FPGAs (field-programmable gate arrays — big chips full of digital logic and links that you program to turn them into the circuits you want) for a long time. I understand them conceptually but have never had the chance to work with them.

In November of 2008, I found and ordered the Terasic DE0-Nano FPGA trainer / development board featuring the Altera Cyclone IV 4C22 FPGA. It has onboard LEDs, pushbuttons, DIP switches, accelerometer, and A/D converter; USB host connectivity; a set of tutorials to get you started; and (at least at the time) free host development software for Windows and Linux (which I can’t find online right now). And it’s $86 at Digi-Key.

After some period of not doing anything with it, I mentioned it to John Harrison and he suggested that he get one (and did) and that we challenge each other to go through the tutorials and then expand our knowledge by creating further interesting projects. Which we hadn’t done yet when we reminded each other about it … in December of 2013. And — you guessed it — haven’t done it yet.

Another reminder last month, and John boldly said, November 1! (He cunningly left off the year.)

November 1 it is. The learning challenge begins.

Care to join? Blog and I’ll link to you. Send (family-friendly) pictures and/or narrative and I’ll post them.

Careful with That Desulfator, Eugene

September 19th, 2014 by Keith Neufeld

I’ve achieved some promising results from my battery desulfator / dewhiskerer / whateverer … and some less promising results.

overcharged 9-V / 7.2-V batteries

The smaller the battery, the more important it is not to forget that the desulfator / dewhiskerer is on. This was, as I recall, only about a fifteen-minute overdose. The magic smoke, I assure you, got out.

Subwoofer Voice Coil Failure Modes

June 9th, 2013 by Keith Neufeld

From the latest batch of reconing:

Three broken subwoofer voice coils

The left two are open — you can see the broken wire at the bottom of the left coil and the top of the middle coil. (As always, click for full-sized image.) The right one is shorted and I haven’t found where.

I find it interesting that these are wound with round wire and the replacements are wound with flat-cross-sectioned copper “ribbon,” to get more current capacity in the same vertical space.

$10 Razor E100 Scooter Project Day Two: First Battery-Charging Attempt

April 28th, 2013 by Keith Neufeld

Razor E100 battery and speed-control bucket

I tend to assume that batteries I happen upon will not be charged. Also that lead-acid batteries I happen upon will be low on water, even so-called sealed lead-acid batteries.

I wanted to start charging the batteries from my “new” scooter while working on other aspects of the project and the scooter didn’t come with a charger — I’ll deal with that later. Not knowing much about the wiring circuit yet, I didn’t want to connect an external charger to the batteries while they were still in-circuit and chance damaging the speed controller, so I needed to disconnect and remove them.

Wiggle wiggle wiggle <grunt> wiggle pull <grunt> WIGGLE WIGGLE BEND <grunt>

Wha?

Soldered battery clip

Who does this??? When they said solder the quick-disconnect terminals, they meant the wire side.

Fine. My uncle’s iron and a pair of pliers solved that problem.

Two sealed lead-acid batteries from Razor E100 scooter

Two batteries, extricated and not yet cleaned.

Prying open sealed lead-acid battery cover

In spite of being “sealed,” you can pry off the cover (preferably after cleaning, which I did first with Goo-Gone and then with dish soap and water)

Sealed lead-acid battery cell caps

and get to the cell caps, each with a little absorbent pad in case the cell venting carries too much moisture.

I could see no water in any cell of either battery. I borrowed a jug of distilled water from my folks (I don’t know why Mom always has some, but she does) and started filling them up … after taking measurements.

Battery 1 Battery 2
Initial 11.68 V 9.99 V
After adding water 11.62 V 9.92 V

I filled each cell, waited for air bubbles to trickle to the top, refilled, waited, refilled, waited … I’m guessing between the initial fill and while charging, I ended up putting at least 10 ml of water into each cell.

Then put battery 1 on my variable power supply with the voltage set to 13.8 V and the current limited initially to 0.1 A, raising the current limit to 0.3 A as it was clear that nothing horrible was happening. I checked on it every half-hour to hour, frequently refilling at least one cell in which I could no longer see any water.

After about four hours, it was up to 13.5 V. The water level in the cells had risen to overflow the opening and fill each reservoir. If I watched long enough, I could see the water in a couple of cells <pop>, indicating they were just starting to gas and it was time for me to stop this method of charging for the day. (More on that on a subsequent day, hopefully tomorrow.)

Charging sealed lead-acid batteries with power supply

While battery 1 was charging, I was also checking water levels in battery 2 and refilling low cells, just sitting on the counter.

Recalling that it had an initial 10 V charge to battery 1′s 11.7 V, noting that they had been connected in series, and knowing that the worst cell in a battery generally has a cascading failure, I expected a different charging experience from battery 2, and I was quite right.

I connected it to the power supply and it immediately showed 13.8 V at a 0.1-A current draw. Now, about an hour later, it’s at 13.5 V and 0.3 A and most of the cells have overflowed. It’s nearly done charging but I haven’t put nearly as much energy into it as I was able to put into battery 1 — that is to say, it’s not “taking” as much of a charge.

Battery 1 Battery 2
Initial 11.68 V 9.99 V
After adding water 11.62 V 9.92 V
After charging 12.68 V 12.48 V

Tomorrow, schedule willing, a load test and an attempt at desulfation.

$10 Razor E100 Scooter Project Day 1: Rear Wheel

April 27th, 2013 by Keith Neufeld

This afternoon I learned of the recently- (?) opened Deja Vu thrift store in Newton and made my first purchase: a Razor E100 scooter in considerable state of disassembly. I’ve long thought that electric scooters looked like fun …

Pieces of Razor E100 electric scooter

All of the wires are cut, the deck is missing, the rear wheel was unattached, naturally the drive belt was missing, and no charger.

$10. I bought it. Sounds like a fun project, eh?

Razor E100 scooter battery compartment

The battery and speed-control bucket could use some repair but seems at least functional. I started working on the batteries but as soon as my brother was available redirected my attention to reattaching the rear wheel.

Razor E100 scooter rear wheel, loose in forks

The rear wheel is belt-driven and needs to be positioned to align with the motor pulley but the spacers were absent and it slid freely from side to side.

Cutting a roll pin

A trip to the hardware store resulted in a roll pin with ID slightly larger than the 1/4″ axle diameter and length slightly greater than the two spacers needed, for $1.89. Then my brother’s giant chop saw made short work of creating two pieces from one.

Razor E100 scooter rear wheel, mounted

Touched up a bit on the bench grinder, ends rounded over with a file, and interiors cleaned out with a round file, spacers fit perfectly and the rear wheel bolts on securely. We “kicked” our way up and down the driveway and are eager to get the scooter powered up.

Next: Battery investigation.