I’m salvaging parts from some very old, dead (leaking capacitors and batteries, corroded components) PC motherboards and found some interesting bits.
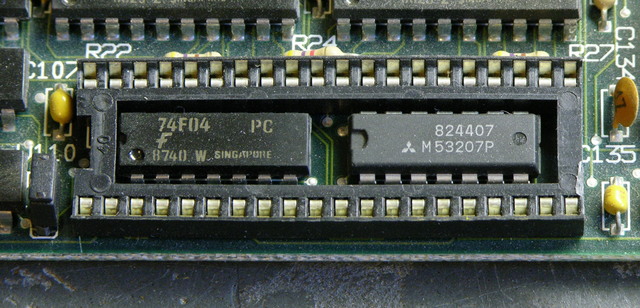
14-pin ICs mounted inside a 40-pin IC socket (that was populated). Very cute. Makes me want to do something extra-naughty, like mount an SMT IC underneath a DIP (no socket needed).
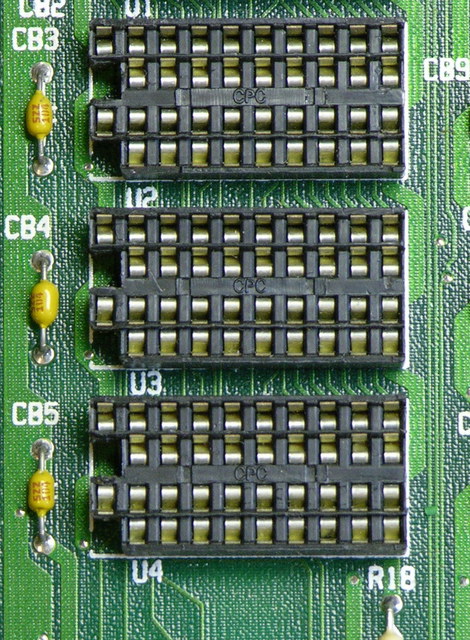
18/20-pin IC sockets, so you could pick which size L2 cache chips to install. Although it’s not obvious from straight above, these are not hacked together out of regular sockets — they were manufactured this way.
I found them on two different vendors’ boards, and I had never noticed them when I was servicing PCs during that era. I guess it solves the problem of knowing which end of a regular 20-pin socket to stuff an 18-pin IC in; or maybe the 18-pin and 20-pin ICs didn’t have compatible pinouts.
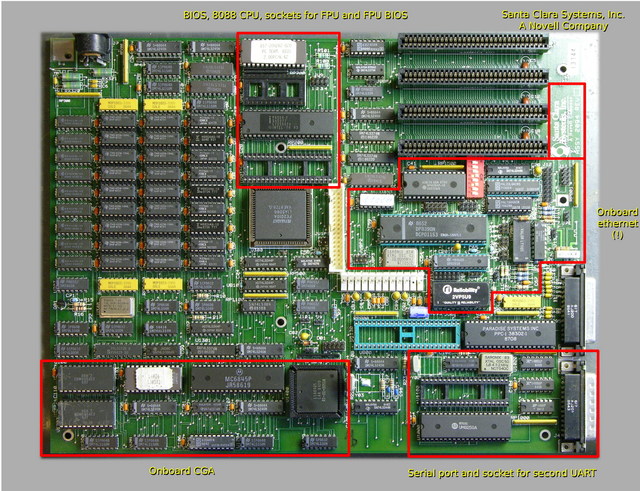
A Novell 8088 motherboard with onboard ethernet. Various other curiosities are visible in the large version of the picture, but worth noting is the “PC TERM. BIOS,” which leads Joel to question whether this was a dual-function PC and network terminal.


Wow, these pics bring back memories. I remember the dual sockets for cache and such, that was pretty common back in the 8088/286 days. Seeing these old boards reminds me of repairing a motherboard back in my college days. I was too poor to buy a new board so I spent several evenings with a multimeter tracking down what turned out to be a faulty diode. After a quick trip to Radio Shack I was back in business, boy was I proud!
Whoa! Did you notice the stamp on that ethernet controller chip?
“Engr-Sample”? I bet you don’t see that very often, especially on
production boards.
Interesting mix of DRAM chips. Most systems I’ve seen have used the
same manufacturer, but these seem to be a mix of manufacturers. At
least it has parity.
Dave
Dave, good eyes! I hadn’t noticed that, and there’s another on a 16-pin chip to the right of that.
Joel has several more of these in better condition — we’ll have to check whether they were all made using stamped samples.
Of the two other boards, one has already had many of its socketed chips
removed (I may still have them…), and the other was non-sampular.
JCE
I’ve got loads of discarded boards with all kinds of through-hole components on them, but I’m having a lousy time removing anything with more than three leads.
I’ve tried a solder sucker and desoldering braid. On really small pins, the sucker is awkward and I’m usually not quick enough. The braid just doesn’t seem to absorb much (could it be too old?)
I have a new variable-temp soldering station with a pencil-tip iron. I was trying to remove some really big electrolytics from a board at one point, and noticed that I couldn’t melt the solder around the leads. Mind you, they were thicker than your average leads, but I had my iron turned up to max and had given it plenty of time to heat up… maybe my iron is a dud…
I was thinking of waving a small torch across the back side of the board while gently pulling on the desired part on the other side of the board. I don’t mind toasting the board – it’s the odd part that I want (due to the nasty vapors, I’d do it outdoors of course). This weekend I calculated the cost of the bottled fuel (propane, MAP, whatever), and realized that I’d have to come up with something else…
How do you guys do it? Do you have special desoldering tools like hot-tweezers, or am I missing something?
Thanks.
Mr. INTJ
INTJ, a heat gun is your friend.
Regarding the solder braid, I’ve had trouble with some recently too. I noticed that it was old and all the flux had flaked off — refreshing it with wet flux (a dip or a drop) makes it good as new.
INTJ, to renew your solder braid, tooth brush it with clear vinegar, rinse then dry it, then add a stripping of your appropriate soldering flux. Voil\a! Same advice as Keith above. Let me know if you guys mail parts trades.