Archive for the ‘3D Printing’ Category

The Lawn Under the Lawn

Sunday, August 22nd, 2021

“Yak shaving,” well-known among a certain class of nerds, refers to artificial dependencies that you insert before your ultimate objective, distracting you and derailing you from getting the job done. My favorite sample yak shaving is on Seth Goden’s blog from 2005.

Yak shaving would be: I want to use the lab power supply on my workbench, but my CupCake is hooked up to it, and I haven’t finished getting the CupCake’s aging extruder motor to work, so suddenly I’m spending the weekend working on the CupCake, so I can get it fixed and move it out of the way, so I can use the power supply under it to do … whatever it is that I was going to do. (This is a fictional, but relatable, example.)

Some time back, Cort said to me:

Doing technology work is often like going out to mow your lawn, and you think it’s going okay, but partway into it you discover there’s a whole ‘nother lawn under your lawn, and now you have to mow the one underneath before you can mow the one you thought you were there for. And then sometimes you start mowing the lawn under your lawn and you find out there’s another one under that, too.
(more…)

Tryna Print Some TPU

Friday, August 6th, 2021

I picked up a couple rolls of Overture TPU and it’s lovely stuff — supple and squishy and I really want to use it — but I just can’t get it to print right.

Block printed in Overture TPU with insufficient extruder tension

(more…)

Blue 3D-Printing Build Surfaces Are Great

Thursday, January 7th, 2021

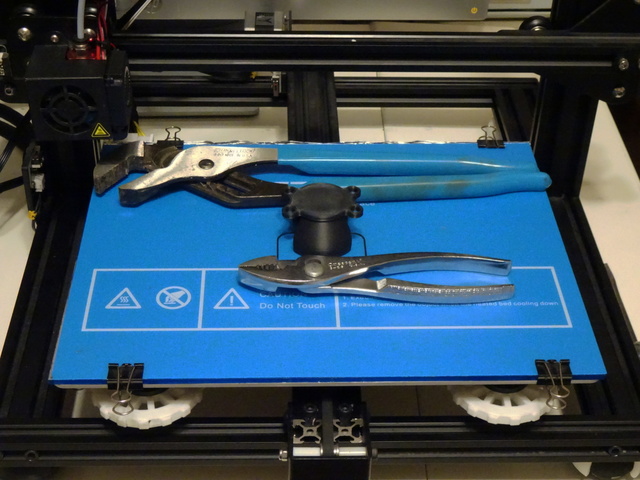
Creality CR-10 Mini 3D printer with print

I am loving this slightly-textured build surface. ABS sticks to it well enough not to peel even without an enclosure, and PLA works great, too. The texture is just enough to make the bottom of a print blend in with the other faces. So far it’s providing so much better results than my Prusa PEI spring steel sheet that I’m on the verge of ordering a clone spring steel sheet and covering it with this.

You can find them on Amazon by searching for “blue 3D printing build surface” (or just “3D printing build surface”) and scrolling through the inevitable irrelevant Amazon results until you find the offerings from Chinese companies named <random letter> <random letter> <random English word>.

And, er, I bought a secondhand Creality CR-10 Mini (300 mm x 220 mm build area) to be able to print something a little longer than my Prusa can do.

Replacing a Pollcat Power Supply

Saturday, October 3rd, 2020

Replacing a power supply should not be a noteworthy task; but when an exact replacement for the failed power supply isn’t available, one wants to exercise some care and diligence installing a compatible-but-different power supply.

Shamefully long ago (cue Wham’s delightful “Last Christmas” and sing along to ignore the guilt), one of the two redundant Pollcat telephony call-detail-monitoring gateways at work didn’t recover after datacenter electrical maintenance. Last weekend I finally looked at it, confirmed that the power supply was dead, and confirmed that the rest of the unit operated fine when run from bench power.

Pollcat shown with new and broken power supplies

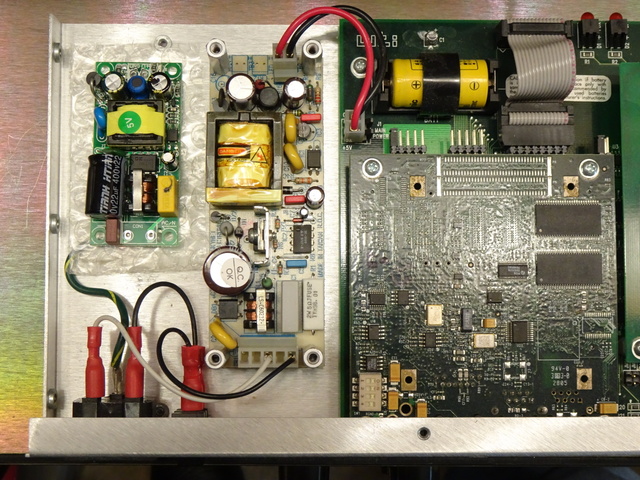
I couldn’t find a reasonable source for the original model of power supply (the right of the two, toward the center of the photo); so after a bit of searching came up with different a 5-VDC 2-A open-frame power supply (the left, on some bubble wrap) that can physically fit into the available space in the enclosure and that can also operate from 100-240 VAC (important for datacenter 208 VAC) for a very affordable $10. We ordered a couple of them and I got it replaced this afternoon. I expected from the beginning to have to make a mounting adapter, but I also had to mind the polarity of both the AC and DC power connectors.

(more…)

MakerBot CupCake’s Triumphant Return, Part Before 1: The Z-Axis Stepper Motor Is Getting Old

Tuesday, September 15th, 2020

Back in 2018 when I got the CupCake out to fix the extruder-stall problem from 2014, it had a new problem of the Z motor not doing what it was asked. The stalling motor was enough to stall me for another couple of years; or was the skipping motor enough to cause me to skip ahead to 2020 for further diagnosis?

top of MakerBot CupCake

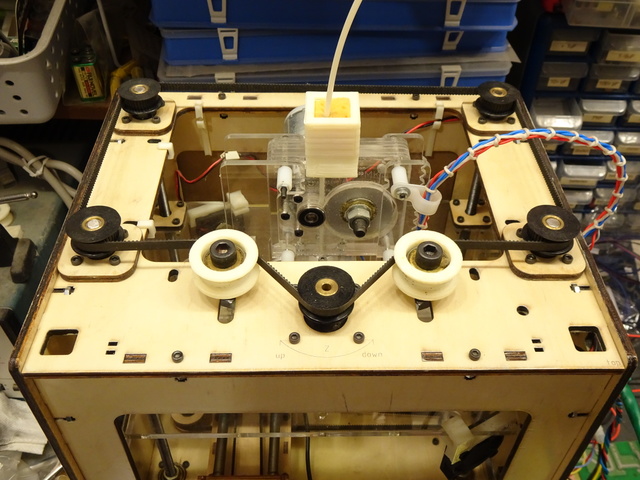
The CupCake’s extruder mounts on a Z stage that lowers down to the build platform. The Z axis is run by a stepper mounted inside the frame at the front, with the central black pulley on the motor shaft driving the belt that connects the four black pulleys on threaded rods protruding down into the machine to raise and lower the Z stage by its corners.

As I was testing in 2018, and again this spring, what should have been continuous movement of the Z axis getting down to the platform to start a print would once in a great while pause and resume. I didn’t hear the characteristic clack/clonk of a stepper motor skipping steps, but it was hard to be sure. But whatever the cause, if the Z motor wasn’t running completely reliably before a print, there’s a fair chance that it could misbehave during a print. Plus a printer with neither Z probe nor Z endstop makes it hard enough to set first layer height already; I don’t need to play this game in Nightmare mode.

Part of the challenge was replicating the problem. In the first run at Cort’s house, everything worked initially, then finally misbehaved many minutes into a print. After restarting the print, again it took many minutes before the next failure, suggesting that we were going to have a dickens of a time watching the problem on a scope and reinforcing my decision to take it to his house where we could use his digital scope with triggered capture.

However, after some fiddling, we discovered that if I used the ReplicatorG control panel to continually jog the Z up and down, at least after the printer was warmed up, it would occasionally pause, which we could hear as well as see. That in turn led to an even more interesting discovery.

(more…)

Engineering Construction Set, Part 1: Sticks and Brackets

Monday, September 14th, 2020

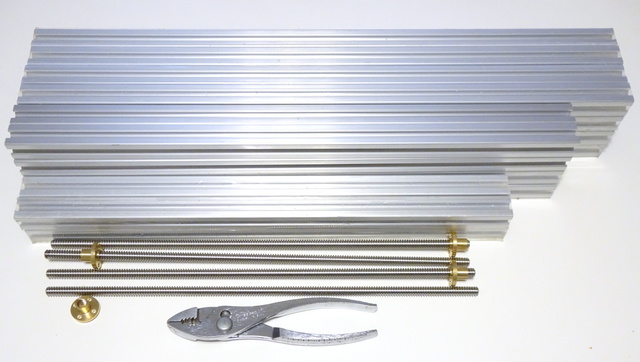
2020 extruded aluminum (so named for its 20-mm-square cross-section and not, confusingly, for the year that I bought it) and its larger siblings seem to be the preferred current construction set for engineers. Each face of the aluminum sticks has a T-slot that accepts a nut or the head of a custom machine screw, allowing the sticks to be fastened together without drilling holes and thereby facilitating rapid physical prototyping.

2020 aluminum extrusions and 8-mm lead screws

I recently ordered a stack of 2020 extrusions pre-cut to several lengths I wanted to play with. It was my first foray into AliExpress, which (that particular foray) went quite well. The tidy pile above cost me only a little over $100, the best deal I could find in several places I looked.

2020 aluminum extrusions with 3D-printed corner bracket

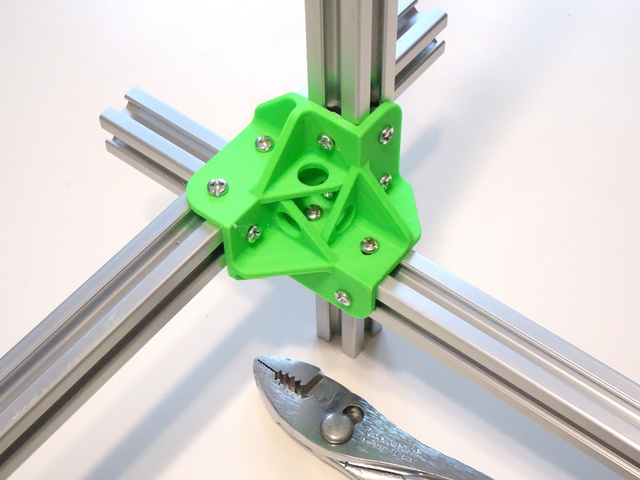
Since receiving that shipment, I’ve been prototyping brackets for attaching 2020 extrusions together. Shown here is the overly elaborate last one I’ve tried, because I didn’t get good pictures of the earlier attempts in action.

(more…)

MakerBot CupCake’s Triumphant Return, Part 1: The Extruder Motor Is Getting Old

Sunday, September 13th, 2020

After lo these six long years, I now have the fixes and the knowledge to get the CupCake to complete a print.

3D prints at different nozzle temperatures

Back in January of 2015, I had got my CupCake tuned up for pretty prints and then the extruder stopped working. Two years ago when I documented that experience, I got the CupCake set back up to troubleshoot that extruder problem and I had a new problem with the Z motor skipping steps, which I had to solve before I could figure out why the extruder stopped working 40+ minutes into a print.

I figured that troubleshooting the two problems would be easier with a fancier scope than I have; so a few times this spring, carefully observing COVID-19 precautions, I made couple-hour visits to my friend Cort and his basement workshop. Over the course of those visits, we were able to identify and address the Z-axis problem (which I’ll write up later) and make some observations about the extruder that ultimately led to a successful workaround this weekend.

(more…)

Inserting Weights Into a Print

Sunday, October 27th, 2019

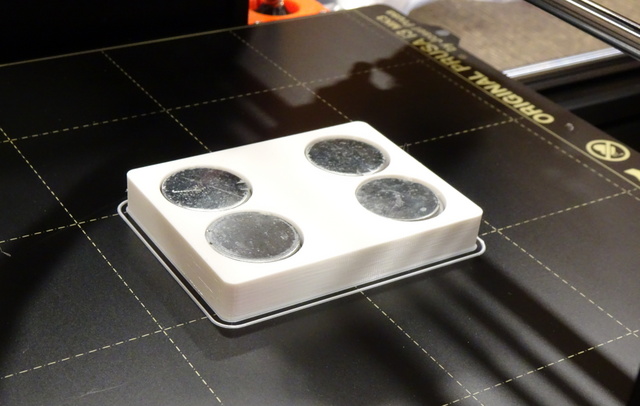
While designing a (different) small box, I knew I wanted it to have a heavy base to keep it from being tippy. I designed recesses in the base for stacks of electrical box knockouts (that I’d been saving for recycling, because I’m just that way and I can’t help it) and had to look up how to get the printer to pause for me to insert them. Because I am not steady enough to play Operation, the Wacky Doctor Game when the patient is awake and trying to bat away my tools.

weights inserted into 3D print

In PrusaSlicer, the answer is to slice the object once, then grab the slider to the right of the plater and drag it down to the layer that you want the printer to pause before beginning to print. Hit the + button immediately to the right, telling PrusaSlicer that you want to do a manual filament change to make that layer be a new color, and then reslice. You can verify the pause with the slider; everything below the pause will be shown in one color and everything above in another.

When it finishes the layer below, the printer goes through a superfluous dance of unloading and reloading the filament, but it works out fine.

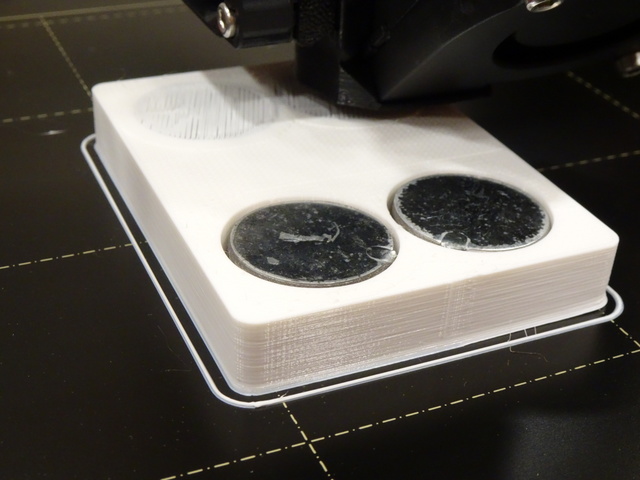
3D printer covering weights inserted into print

After resuming, the printer bridges nicely over the weights, just like it oughtta. Very gratifying.

PLA Shrinks Too

Sunday, October 27th, 2019

Everybody all, “ABS bad, it shrink when you print it,” and I’m, “Yo, dog, PLA shrink too.”

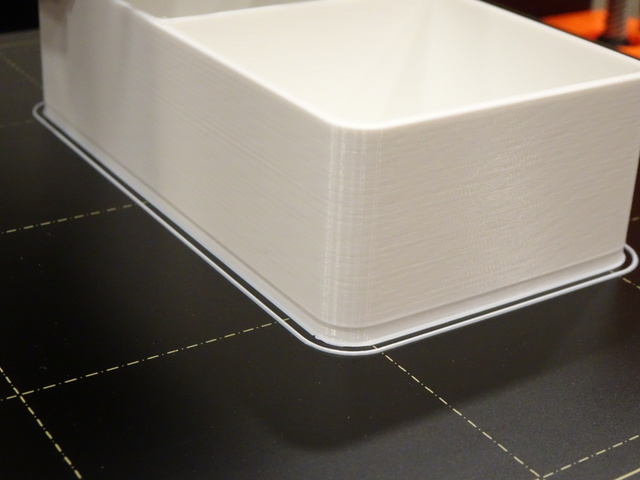
3D-printed PLA box

That’s a box with 2-mm walls and a 2-mm base. Hatchbox PLA. The layers of the base that are not stuck down to the hot build platform shrank right up.

Don’t be up in my grill about PLA being nature’s perfect filament. I need me an enclosure.

Calibrating Filament Diameter, Nozzle Temperature, and Extrusion Multiplier

Sunday, October 27th, 2019

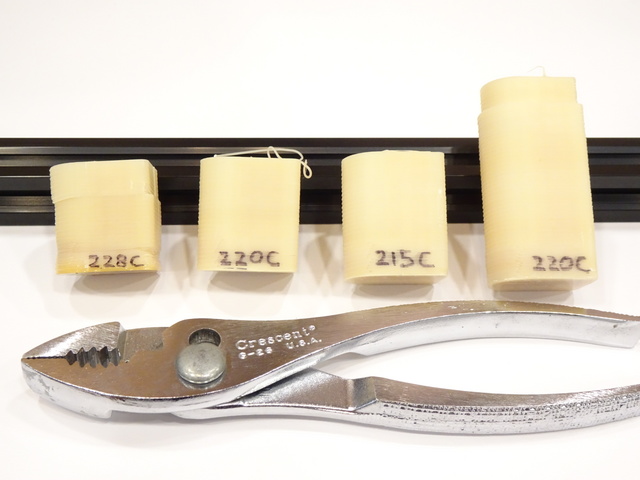
With several filaments I’ve used lately, I get a rough surface on the top of my prints that makes me think the printer is depositing too much filament. I took a bit of time today to learn how to calibrate that; and one of the same tutorials gave a nice reference for nozzle temperature calibration, so I did that, too.

3D printer extrusion multiplier calibration cubes

These notes are as much for me as for thee, as I expect to run through this again with more filaments in the future.

(more…)