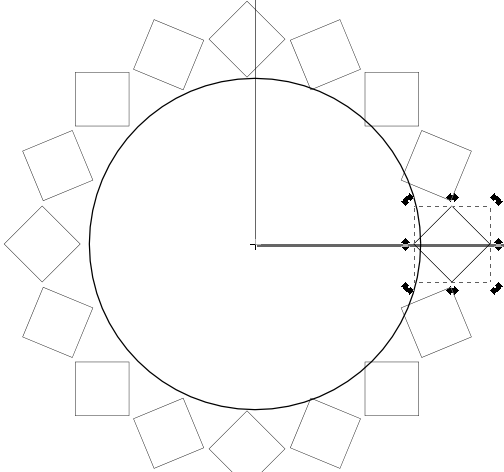
I needed an SVG and DXF of a circle with notches around the perimeter to laser-cut a diffuser lens and to subtract the lens’s shape from its housing in OpenSCAD. The best tool I had for the job appeared to be Inkscape (in part because I really wanted to do it with an open-source tool so it could be repeated by others), and the method was quite a process of discovery, aided greatly by John Harrison.
Here’s how I did it.

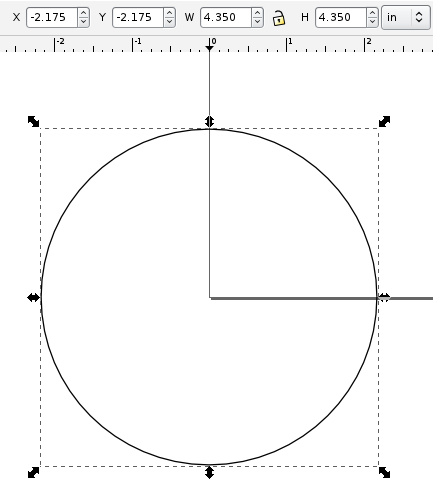
Draw the circle and use the toolbar transforms to set its diameter and position it at the origin. (Since positioning the notching figure correctly on the circle must be done in absolute coordinates, it’s easier to calculate with the circle centered at the origin.)

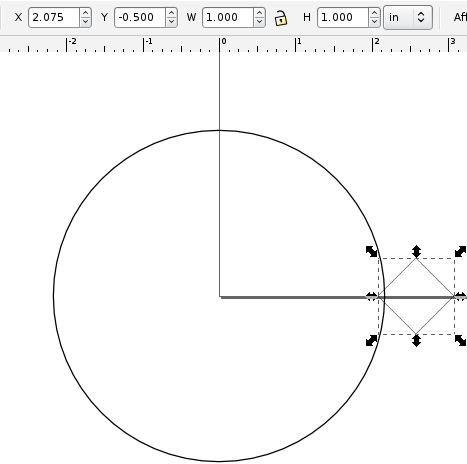
Draw a shape you want to use to notch the circle (in my case, a square rotated 45 degrees) and use the toolbar transforms to position it to notch the circle (in my case, overlapping by 0.100″, by setting the X coordinate to half the circle’s diameter minus 0.1″). The next step will be easier if you also size the shape so that its bounding box (enclosing rectangle) is an even number of the units you’re using in your coordinate system (inches).
I had hoped, by the way, to do this by insetting a circle by 0.1″ (but I can’t find how to inset by a distance other than pixels, nor to set my inset distance numerically other than zoom way in and watch the mouse position while I drag the inset control point) and then snapping the square’s position to the inset circle (but Inkscape doesn’t appear to snap to geometry).

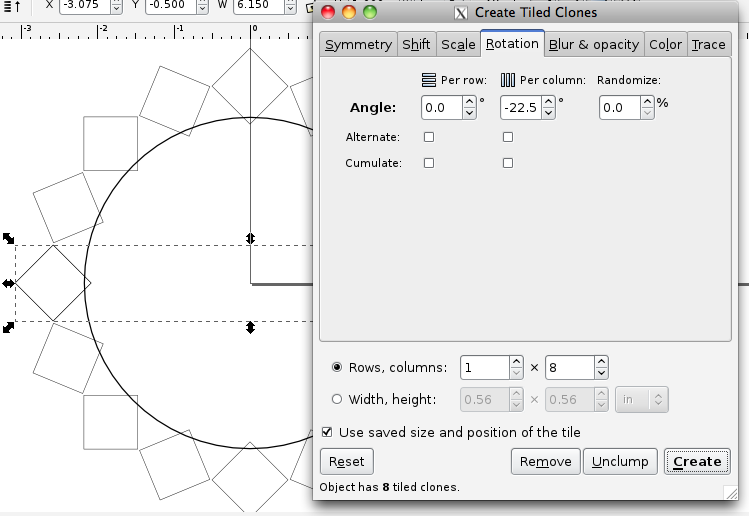
What I tried next did not work — moving the square’s pivot point to the origin and creating 16 tiled clones of the square with -100% shift X per column and -22.5° rotation per column. (I’ll show those steps later when I describe what actually did work.) For some reason, Inkscape acts as though my pivot point is 0.1045″ left of where it actually is, and I’m not willing to fuss with manually calculating the (in)correct pivot point every time I want to tile by rotation.

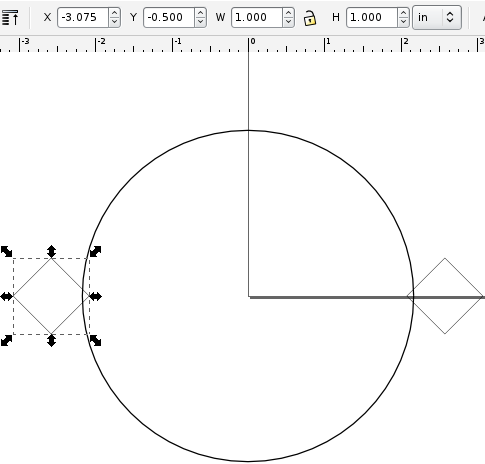
Instead, duplicate (Edit / Duplicate or copy/paste) your notching figure and move the copy to the far side, opposite your original, rotating it 180° if need be. Positioning the second notching shape is where the integer-unit-sized bounding box comes in handy — I placed mine with an X coordinate of negative (half my circle’s diameter minus the inset amount plus the notching obect’s box width), or -(4.350″ / 2 – 0.100″ + 1.000″) = -3.075″.

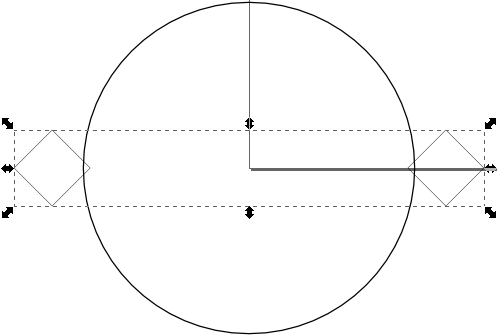
Select and group (Object / Group) the two notching figures. The next step only works on a single object, not on multiple selected objects.

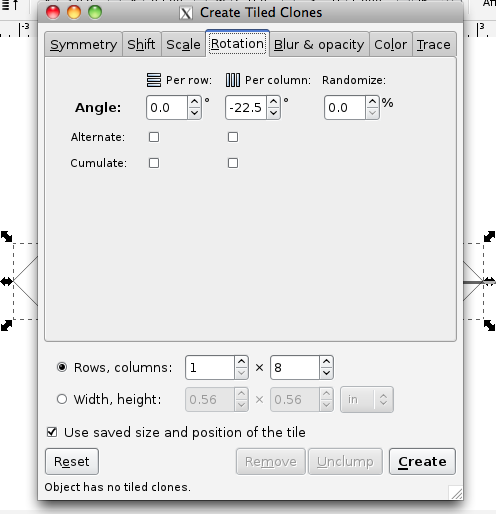
With the grouped notching objects still selected, enter the tiled clones dialog (Edit / Clone / Create Tiled Clones...). On the Symmetry tab, leave P1: simple translation selected, click the Reset button in the lower left to set everything to defaults, and change the number of columns in the Rows, columns to half the number of notches you want (since you’ve grouped two notching figures together already). On the Shift tab, set Shift X to -100% per column. On the Rotation tab, set the Angle Per column to -360° divided by the number of notches you want (-360° / 16 notches = -22.5° / notch). (Apparently Inkscape rotates clockwise for positive angles, the opposite of the entire field of mathematics.)

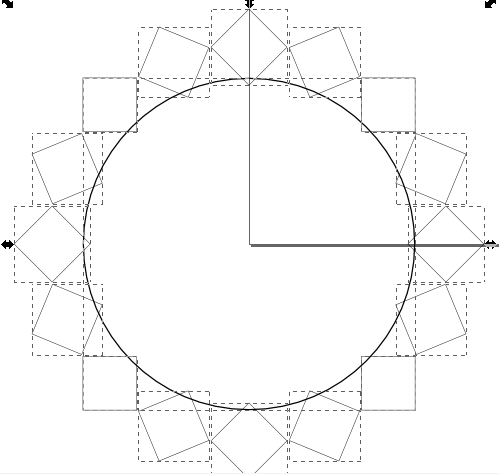
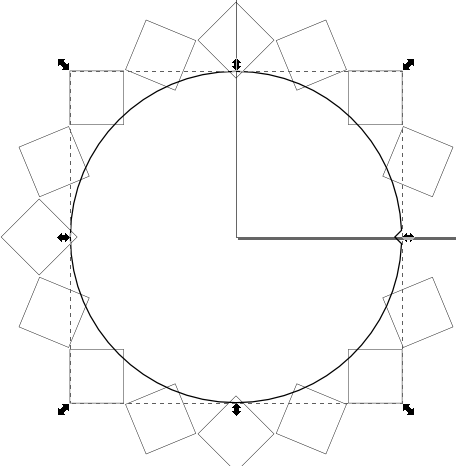
Click the Create button, note that the lower left of the dialog box tells you how many tiled clones have just been created, and slide the dialog box out of the way to view your results. If it’s not what you expected, click the tiled clones dialog’s Remove button and review and retry your tiling configuration until you get what you want. Once satisfied, close the tiled clone dialog box.
Immediately delete (Edit / Delete or press Delete) the selected figure. The tiled clone tool leaves your original figure selected and makes a copy of it at the original position; you want to delete the original before continuing.

Select everything (Edit / Select All or Ctrl A or drag a box around everything) and ungroup (Object / Ungroup) to isolate your notching figures, as the next step operates on only two shapes at a time.

Select your circle and one of the boxes and do a path difference operation (Path / Difference or Ctrl -). This should carve your notching shape out of the circle. If instead it carves the circle out of your notching shape, undo, then select the circle and lower it to the bottom (Object / Lower to Bottom) before continuing.

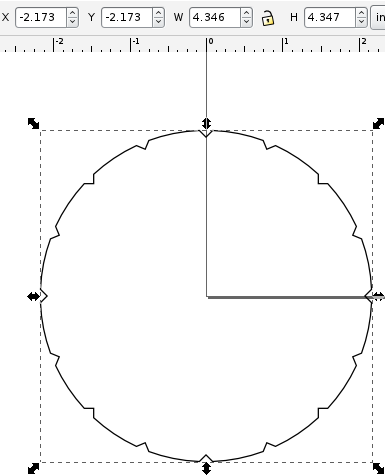
The notched circle should remain selected after each difference operation. Continue selecting additional notching figures and taking the difference until you’ve created all your notches. Voilà! (Or “Viola!,” as we say on the Internet.) A notched circle.
Take care if you intend to move the circle to a specific position on your page: its dimensions may have changed, as the dimensions shown are those of the bounding box and any notches on the right, left, top, or bottom may have allowed the bounding box to creep in a bit. You may need to account for this and add a tiny offset to get the center where you want if you’re positioning the notched circle numerically.
Better Ways?
If you know an easier way to do this, I’d love to hear about it in a comment. Please try your method, right now, before posting a suggestion. It’s too easy to think something will work, or think you remember the exact details, and with the best intentions still mislead people. Always always always test your technical advice before posting it.
