Archive for the ‘MakerBot CupCake’ Category

MakerBot CupCake’s Triumphant Return, Part 2: Skeinforge Slices; CupCake Prints

Saturday, October 31st, 2020

With the CupCake printing successfully again, the next step was slicing so that I could print new things instead of only reprinting G-code that I’d saved in 2012.

As noted before, I hadn’t figured out how to get Skeinforge to run on a current computer, after losing my previous Skeinforge installation to the crashes of both my personal desktop and laptop computers, on which I had all of the data and none of the software or configurations backed up. (I’m wiser now.)

I struggled figuring out how to get Skeinforge running again now, in part because I think the instructions that come with it never got updated as its capabilities did. No, I am not going to copy the STL into the system executable directory every time I want to slice something and then move the resulting G-code back out. It turns out that any version of Skeinforge that I might actually want to run has a file browser and remembers where you browsed the last time you used it; so it’s pretty easy to get along with.

And as to which version I actually want to run, one of the files I did have backed up was my detailed notes on fine-tuning Skeinforge settings for my CupCake, which (naturally) included the fact that I was running Skeinforge 0035. So there we go.

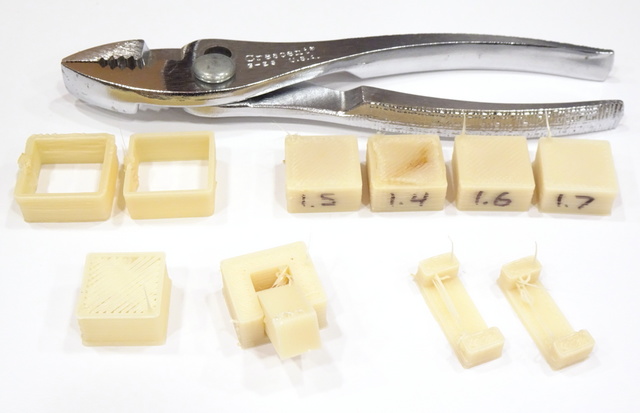
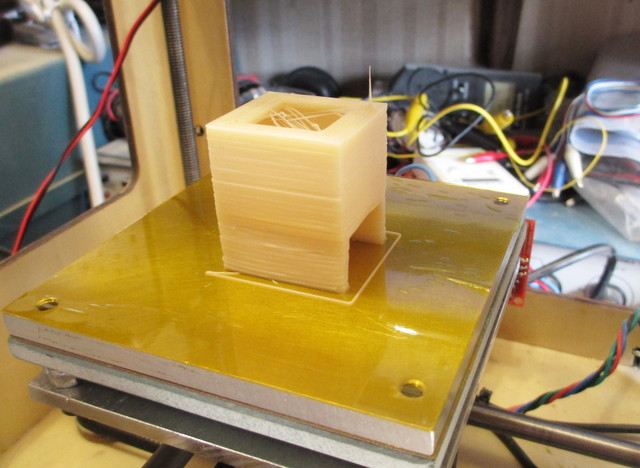
3D printer calibration objects

With slicing working, that just leaves calibration, and I’ve done that now too.

(more…)

MakerBot CupCake’s Triumphant Return, Part Before 1: The Z-Axis Stepper Motor Is Getting Old

Tuesday, September 15th, 2020

Back in 2018 when I got the CupCake out to fix the extruder-stall problem from 2014, it had a new problem of the Z motor not doing what it was asked. The stalling motor was enough to stall me for another couple of years; or was the skipping motor enough to cause me to skip ahead to 2020 for further diagnosis?

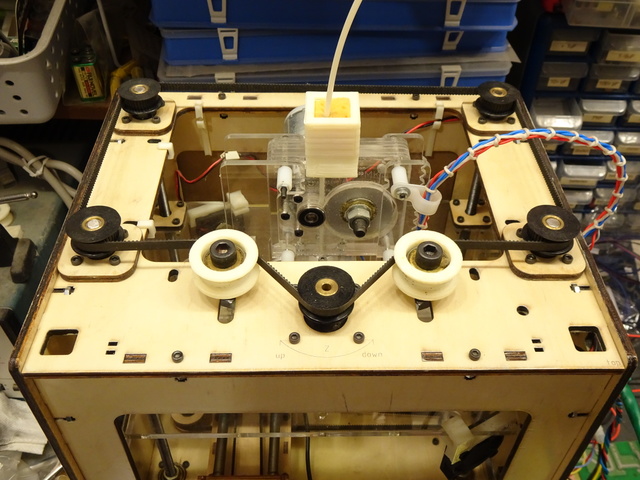
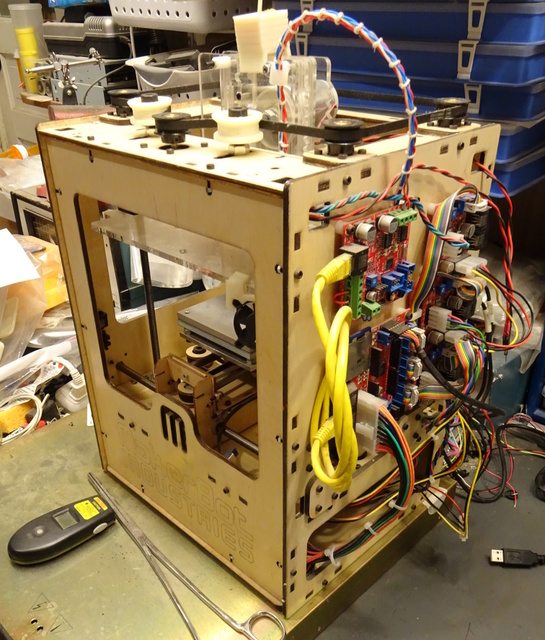
top of MakerBot CupCake

The CupCake’s extruder mounts on a Z stage that lowers down to the build platform. The Z axis is run by a stepper mounted inside the frame at the front, with the central black pulley on the motor shaft driving the belt that connects the four black pulleys on threaded rods protruding down into the machine to raise and lower the Z stage by its corners.

As I was testing in 2018, and again this spring, what should have been continuous movement of the Z axis getting down to the platform to start a print would once in a great while pause and resume. I didn’t hear the characteristic clack/clonk of a stepper motor skipping steps, but it was hard to be sure. But whatever the cause, if the Z motor wasn’t running completely reliably before a print, there’s a fair chance that it could misbehave during a print. Plus a printer with neither Z probe nor Z endstop makes it hard enough to set first layer height already; I don’t need to play this game in Nightmare mode.

Part of the challenge was replicating the problem. In the first run at Cort’s house, everything worked initially, then finally misbehaved many minutes into a print. After restarting the print, again it took many minutes before the next failure, suggesting that we were going to have a dickens of a time watching the problem on a scope and reinforcing my decision to take it to his house where we could use his digital scope with triggered capture.

However, after some fiddling, we discovered that if I used the ReplicatorG control panel to continually jog the Z up and down, at least after the printer was warmed up, it would occasionally pause, which we could hear as well as see. That in turn led to an even more interesting discovery.

(more…)

MakerBot CupCake’s Triumphant Return, Part 1: The Extruder Motor Is Getting Old

Sunday, September 13th, 2020

After lo these six long years, I now have the fixes and the knowledge to get the CupCake to complete a print.

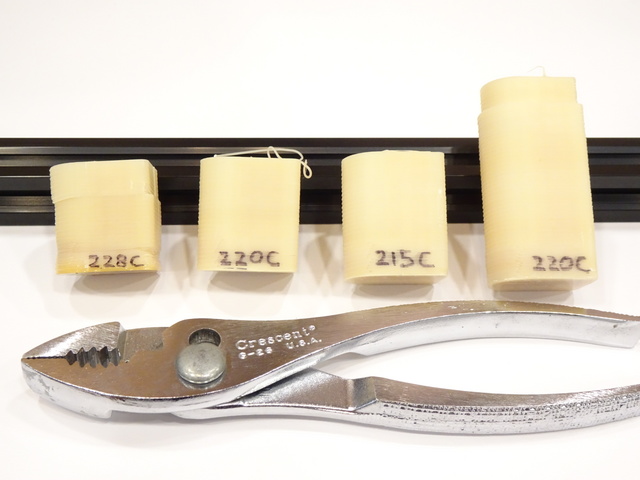
3D prints at different nozzle temperatures

Back in January of 2015, I had got my CupCake tuned up for pretty prints and then the extruder stopped working. Two years ago when I documented that experience, I got the CupCake set back up to troubleshoot that extruder problem and I had a new problem with the Z motor skipping steps, which I had to solve before I could figure out why the extruder stopped working 40+ minutes into a print.

I figured that troubleshooting the two problems would be easier with a fancier scope than I have; so a few times this spring, carefully observing COVID-19 precautions, I made couple-hour visits to my friend Cort and his basement workshop. Over the course of those visits, we were able to identify and address the Z-axis problem (which I’ll write up later) and make some observations about the extruder that ultimately led to a successful workaround this weekend.

(more…)

Chewing ABS to Make New Filament

Thursday, August 16th, 2018

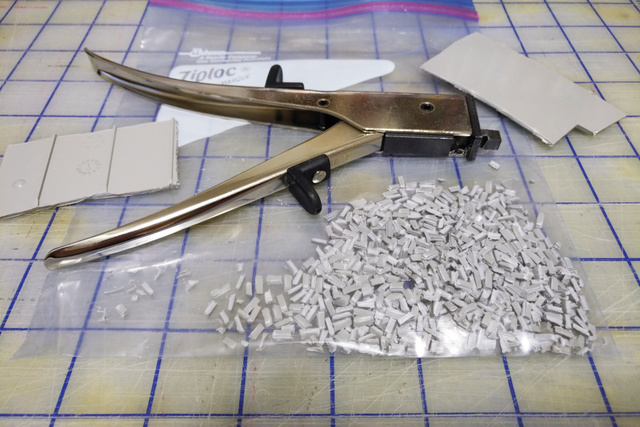
Like many other 3D printer owners, I’ve long dreamed of processing post-consumer plastic into new filament for printing. I’ve now taken a couple of steps in that direction.

ABS plastic pelletized with sheet-metal nibbler tool

(more…)

Booting the MakerBot CupCake after Five Years Part 3: Heated Build Platform and First Print

Monday, July 9th, 2018

Friday evening I left off with the extruder working again. Saturday I focused on the heated build platform.

I’ve always had astoundingly good luck with kapton tape since nophead’s serendipitous discovery, probably because I (still) prefer to print in ABS. When the build platform is warm, my prints stick to it absolutely with no raft or mouse ears and once it has cooled, they release easily. That’s a pretty compelling combination.

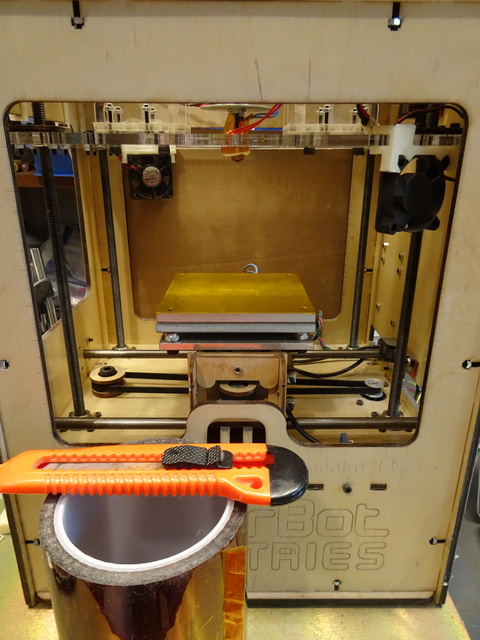
kapton tape for MakerBot CupCake heated build platform

So my first step was replacing the scraped-up kapton that I gouged the last time the printer was on. I bought a 4″ roll way back when and I keep a strip of unsticky tucked under the end so I don’t have to peel it up with fingernails and get fingerprints on the stickum.

In the past I’ve always replaced the tape by sticking down the end and using a credit card to “squeegee” it onto the surface, and it can be tough to avoid getting bubbles. Yesterday I unrolled enough tape to cover the platform and when I had it stretched out, it was easy to align the front edge of the tape with the front edge of the platform, at which point I squeegeed it down with my thumb with no bubbles at all. Huh, well, I guess I’ll remember that.

(more…)

Booting the MakerBot CupCake after Five Years Part 2: Installing Software

Saturday, July 7th, 2018

The next step in running the CupCake 3D printer is reinstalling the software and connecting to the machine.

ReplicatorG 0026 main screen

It went surprisingly well, with the only real snag being my misremembering the installation process, leaving me stuck in NotConnectedLand for a while.

(more…)

Booting the MakerBot CupCake after Five Years Part 1: Powering Up

Friday, July 6th, 2018

I devoted Wednesday, my Independence Day holiday, to getting my CupCake 3D printer running again.

MakerBot CupCake

Foreshadowing: It turned out as a pessimist might suspect rather than as an optimist might plan.

(more…)

Why I Haven’t Touched the MakerBot CupCake for Four and a Half Years

Wednesday, July 4th, 2018

After making the filament de-duster five years ago about which I posted recently, I was finally getting consistent, reliable, beautiful 3D prints for the first time ever. For a month.

Then I was trying to print a draft of a pocket holder for a tube of moustache wax and comb and when I came back, I found that something had gone wrong after about 40 minutes of printing. I forget the order in which these occurred, but through the original attempt and two retries it:

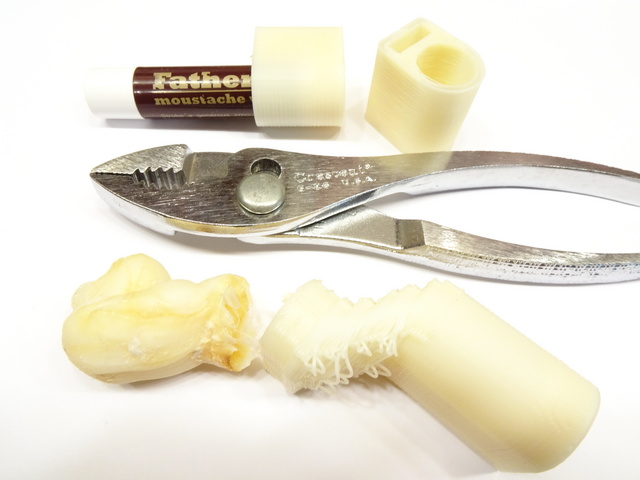
  • kept running the filament while printing so the model snagged and the X-Y build platform skipped steps and lost its place; then when the print finished, kept the extruder on forever, creating a thumb-sized fungal growth of plastic
  • kept moving the X-Y build platform but stopped extruding
  • kept moving the X-Y build platform but shut off the nozzle heater, chewing a divot through the filament

failed MakerBot CupCake 3D print

The second try, I ran another print of the same model; the third try, I made a tiny dimensional change to the model or Skeinforge settings in case the extruder controller was glitching on some particular G code; but that doesn’t seem to have been the case. I got different bad behaviors and it seemed as though the extruder controller stopped taking instructions and kept doing exactly what it was doing at that moment.

I don’t know whether it’s a firmware bug, a power supply problem, a wiring problem, an extruder board problem, or something I haven’t thought of yet. I have (recently) found reference to a few of the DC extruder motor windings shorting, reducing the coil resistance and increasing the load, to the point that the extruder controller FETs burn out. But these weren’t burned out — they worked again immediately (for another 40 minutes).

And then before I could muster the motivation to troubleshoot it, both my laptop SSD and my workstation motherboard crashed, leaving me no working computer with 3D-printing software installed and no working computer with my CupCake’s calibration settings on it. And then time passed; OSes were upgraded; ReplicatorG versions increased; the barrier to reentry increased substantially; and I simply have not touched it since early 2014.

This shall change.

Filament De-Dusting for the MakerBot CupCake [from 2013 Draft]

Friday, June 22nd, 2018

I’ve just found this post I had started drafting in December 2013 and hadn’t finished. The remarks about reliability and long periods of disuse are still pertinent — this was one month before the last time I attempted to use it — as is the dust solution.

In the four and a half years I’ve owned my MakerBot CupCake 3D printer, I’ve never had it working well enough to use for more than a week or two at a time. My real frustration has been a lack of understanding what has failed and how to fix it, so much so that it’s been almost two years since I most recently gave up and put it away. [Written in December 2013, and I haven't used it since January 2014.] I know there are newer, more reliable printers on the market; but it sure seems like it should be possible to get the CupCake to work reliably, if I’m willing to upgrade critical parts.

In the intervening time [meaning 2011 to 2013], my friend Joel has run some prints for me on his Thing-O-Matic. Recently while chatting over a print in progress and checking whether the filament was jammed (solution: his build platform’s aluminum heat spreader was bolted tightly around all the edges, expanding when hot, bulging up in the middle progressively over an afternoon of attempted printing, and blocking the nozzle which was enough to jam things up), he mentioned that his nozzle had jammed to the point that he couldn’t even push filament through by hand with pliers (yes, my problem exactly) and that he had solved it (oh???).

Dust.

Joel had disassembled his extruder and lightly drilled most of the filament out of his clogged nozzle with an undersized bit, as I had in the past; then soaked out the rest of the plastic with acetone, as I had also. But when removing the clogged filament, Joel noticed it was quite dirty and made the mental connection with dust on the filament. When he reassembled, he added a toothbrush to wipe dust off the filament on its way in and has also made a point to keep his supply bagged and/or boxed. Since then (and until the expanding heat spreader), he’s had no further troubles with clogging.

This is not a new issue, but I had never heard anyone indicate it had so completely jammed their nozzles that their extruder wouldn’t extrude.

And it fixed my CupCake. Mostly. For a while.

Filament-wiping sponge holder, freshly printed

(more…)

Rebuilding the CupCake Extruder Heater (When It Wasn’t Very Broken)

Sunday, January 29th, 2012

After some success back in June using fans to cool extruded layers on my CupCake — in fact, right after that success — it slowed extruding and eventually stopped extruding altogether. This is the story of my life with the CupCake — a very brief success from time to time, but never persistent nor replicable.

When I say stopped extruding, I mean the motor actually ground to a halt. Usually it chews a divot into the filament, but this time it stopped. And I was pretty sure — don’t remember whether I actually checked the on-screen display or not — that the nozzle temperature had dropped and the filament wasn’t melting any more.

I know people talk about extruding ABS at temperatures as low as 200°C, and I don’t find that to be the case in my CupCake. Mine is calibrated, and mine doesn’t like temperatures that it thinks are lower than 220°C, and mine doesn’t really like temperatures that it thinks are below 225°C. So it really doesn’t take much to make it unhappy.
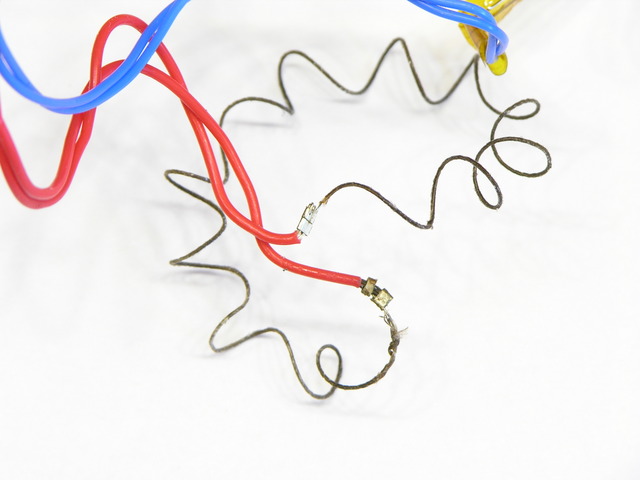
Nichrome wire crimped to teflon-coated wire

I had just rebuilt and rewound my heater at the time, and I knew that I had crimped the nichrome to the teflon-coated lead wires with silver crimp beads. I had a suspicion that the joints had become oxidized under the crimps, and the 7.3Ω resistance across my heater wires seemed high for my CupCake.

A couple of weeks ago I disassembled the heater and found that one of the two connections was indeed quite scorched and oxidized.
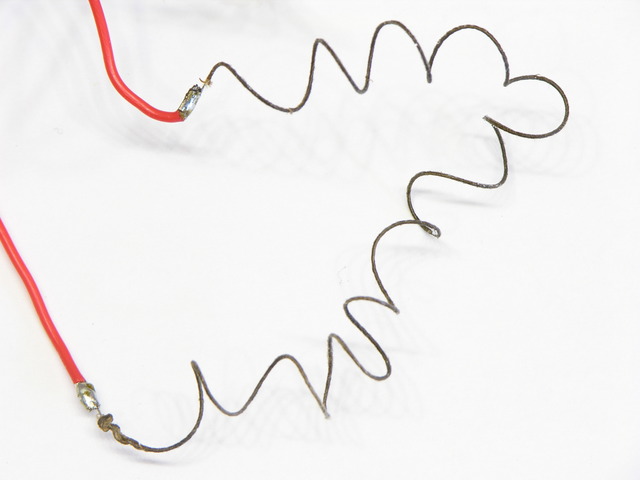
Nichrome wire crimped to teflon-coated wire

After cutting away the crimp tubes, cleaning the end of the nichrome wire with fine sandpaper, cutting back the lead wire, and recrimping, I tinned both lead wires with solder. Solder doesn’t stick to nichrome; but being coated with solder, the joint (which already had a solid mechanical connection from crimping) should be much less prone to oxidation.

After the rebuild, the heater measured 6.8Ω. Half an ohm difference doesn’t sound like that much until you’re trying to get to 225°C. Since power P = V2 / R, at 7.3Ω, P = (12V)2 / 7.3Ω ≈ 19.7W; and at 6.8Ω, P = (12V)2 / 6.8Ω ≈ 21.2W; so maybe that could be enough to make the difference at the high end of the extruder’s temperature range.
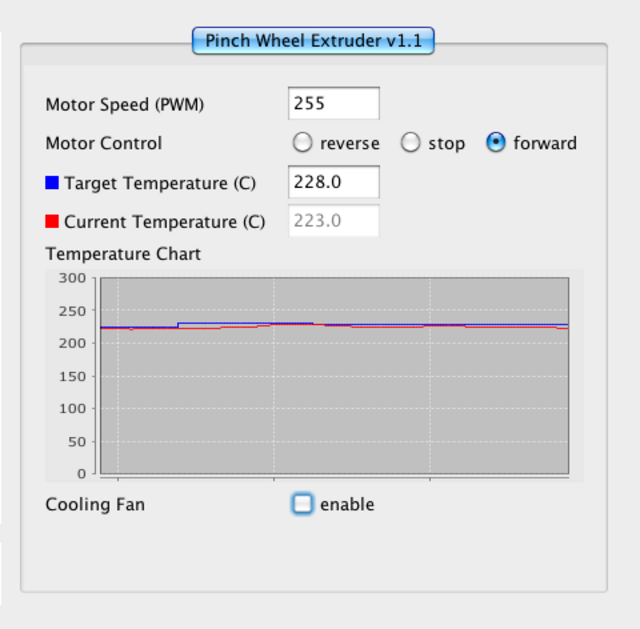
ReplicatorG control panel with temperature failing to reach set point

Aaaand … after reconnecting things, I still couldn’t get the temperature above 222-223°C, even though it now had some 7% more power. That doesn’t seem quite right.
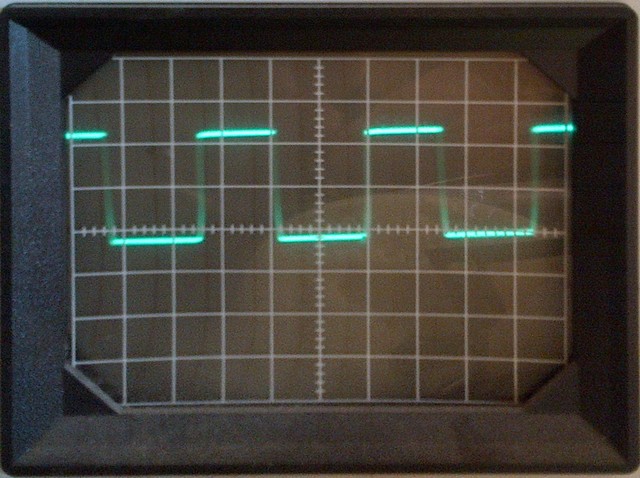
Pulse-width-modulated heater signal on oscilloscope

When in doubt, scope it out. Yeah, after almost a full minute of failing to hold the temperature at the set point, the software PWM in the extruder controller was still running the heater at about a 50% duty cycle. That definitely doesn’t seem quite right.

And isn’t something I can easily fix, either. The ReplicatorG version I was running didn’t have a control panel for the heater PID settings, so (even assuming I was smart enough to fiddle them into shape) I would have had to recompile the code each time I wanted to make a tweak, which wasn’t palatable.

Firmware Upgrade

But I thought I’d heard that newer ReplicatorG versions did bring the PID coefficients into the machine control panel, so I upgraded ReplicatorG from 0024 to 0029r2, and let it upgrade my firmware from v2.4 (I think) to v3.0, and lo! lost communication between ReplicatorG and the CupCake. It said it had a connection but all the menu options to talk to the CupCake were greyed out.

Great.

This is apparently a known problem claimed to have something to do with the Mac’s localization settings for the string representation of “,” and “.” in numbers. Srsly? And the suggested tweaks didn’t fix it for me, so I’ll just wait for the next ReplicatorG release. And since the Mac package of ReplicatorG continues to be a DMG file of all the pieces you have to drag into /Applications/ReplicatorG, rather than a ReplicatorG folder that one could conveniently drag into /Applications like everyone else provides … I guess I should feel lucky to have a Mac version at all, and I’m not holding my breath for a fix on this problem.

Anyway, downgrading ReplicatorG to 0026 restored my connectivity and got me a look at those sweet, sweet PID coefficients.
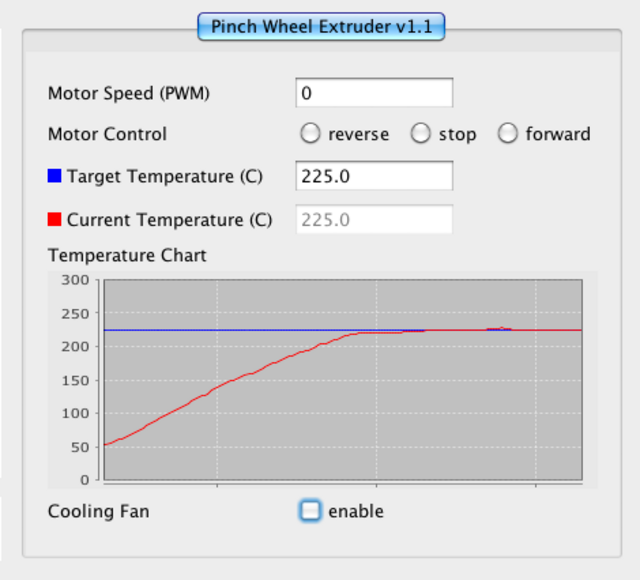
ReplicatorG heater temperature graph

Which I no longer need, ’cause with the upgraded CupCake firmware, the PID algorithm seems to work right. Reaching for the knobs was obviously an attempt at a workaround, and the real fix is oh so much better.
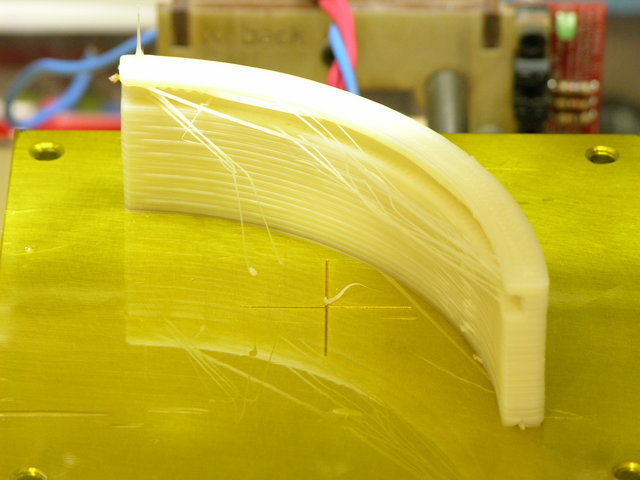
Plastic-extruded filter holder assembly

The stringing on this diffusing filter holder is my fault, not my machine’s — I have a 0° (or 90°) overhang on a concave curve, so there’s no way it was going to come out clean. I still wanted to see what it would do, and it performed admirably under the circumstances of an impossible model.

And then stopped working again.

Filament drive motor locked up against the filament. A-gain. (Yay, great grip on the drive pulley, and nozzle retaining washer not breaking!) Temperature claims to be steady where set.

My utility is fairly cold these days. I’ll try enclosing the build chamber again in hopes that although the nozzle is hot enough, the teflon tube is too cold — but I bet I end up disassembling and drilling out the inside of the tube and nozzle again.

Should have been designed with a quick-release.