Archive for the ‘Roomba’ Category

Scooba Second Impressions

Tuesday, February 10th, 2009

Scooba 5900

My first impressions of Scooba were based on not yet having the official Clorox cleaning solution and running with vinegar water. I got my shipment of the Clorox solution yesterday and ran four cleaning cycles on the bathroom floor. New notes:

  • I had left both batteries fully charged but off the charger for a week, and Scooba reported one as completely dead and the other didn’t make it through a full cleaning cycle. Looks like I’ll need to keep them on the charger and/or use them more frequently.
  • The Clorox solution smells good! (Remember that vinegar is my grounds for comparison . . .) It smells like a cross between some kind of detergent and your widow grandmother’s soap-scented bathroom.
  • The Clorox solution seems to clean a little better than the vinegar water — that is, leaves the floor noticeably cleaner. Scooba made visible progress on the dark marks in the faux grout lines on our vinyl floor.
  • The Clorox solution puts a shine on the floor! I don’t consider it perfect or done, but the bathroom floor looks way nicer than it did before getting Scooba or after running with vinegar.

Note to other secondhand Scooba owners: Buy the Clorox!

Scooba First Impressions

Sunday, February 1st, 2009

I love how my Roombas help keep pet hair picked up with a minimum of effort; and I’ve been fascinated by the idea of the Scooba, iRobot’s wet-mopping robot, since it was announced. I recently picked up a used 5900 in very nice condition on eBay from a wonderful seller who even included a spare battery.

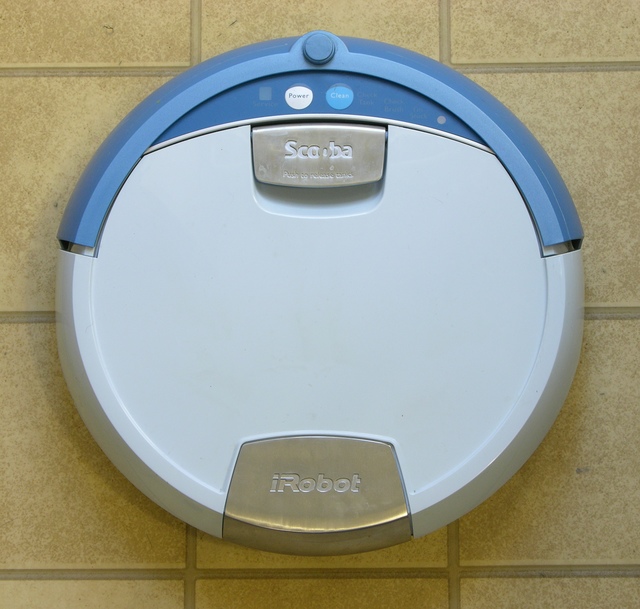
Scooba 5900

I want to start with a pictorial overview, since I hadn’t seen enough Scooba pictures to understand how different it really is from the Roombas, then proceed to a few comments about my experience with it so far.

(more…)

Repairing Roomba Scheduler

Tuesday, January 20th, 2009

Over the holidays, I tried to fix my Roomba Scheduler. I ended up deciding not to try to trace from the battery connector to locate what part had shorted/burned when I connected a rebuilt battery with reverse polarity, I found an eBay seller with remanufactured main boards, and I ordered one for $20.
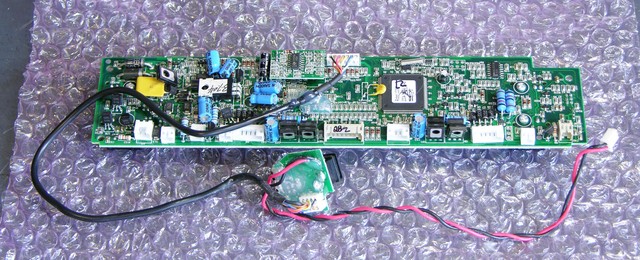
Refurbished Roomba Scheduler main board

Yesterday I had time to swap it out and get Roomba working again.

Board Replacement

I had the new board completely mounted and half the connectors wired up when I noticed the first problem:
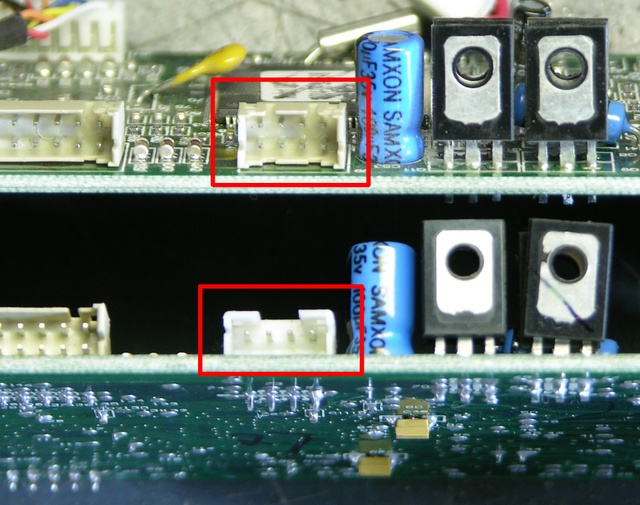
Original and replacement Roomba Scheduler main boards with different dirt sensor jacks

My Roomba has two dirt detectors, and J9 has two rows of pins, one row to each piezo assembly. The refurbed MB had a single-row J9, apparently from an earlier model with a single dirt detector.

I debated a bit about contacting the seller, but decided it was a waste of his time and mine to ask for a replacement board when I had everything I needed already at hand. I desoldered J9 from my original board (tedious heat-tug-heat-tug-heat-tug that demonstrates how good J9′s plastic is because it didn’t melt and how good the PCB is because the only thing I ruined was one of the test points), and had a much easier time desoldering the single-row J9 from the new board.
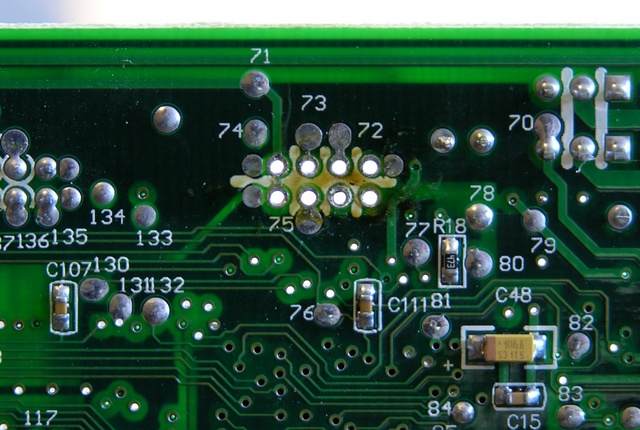
Roomba Scheduler main board with dirt sensor jack removed for replacement

Then I got frustrated trying to get the solder out of the through holes. I had some success adding solder to the holes and applying solder wick, but there were three holes I just couldn’t get. Finally I gave up and pulled out the PCB drill bit set — a #68 bit spun gently by hand turns out to be just the ticket for cleaning the solder out of these holes. (Never again will I try to wick solder out of empty holes.)
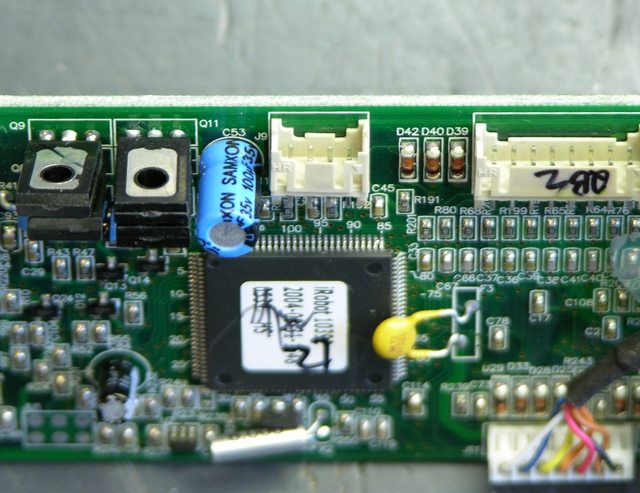
Roomba Scheduler main board with dirt sensor jack replaced

I cleaned the two-row jack’s leads with a wire brush, soldered it in, took a picture from an angle that looks like I still have the single-row jack in the board, and reassembled Roomba.

Attempt #1

I was delighted to see it turn on when I pressed the power button. I knew that should be what would happen, but it was still gratifying to see it actually happen.

Prematurely. Gratifying.

I took it to the living room to vacuum, hit Clean, and it just burped. It burped when I hit any button. Grrrr.

Diagnostics and Cliff Sensors

The first page I found when searching for why it was “burping” was What is Roomba saying to me?, which says that the “eh” sound means there’s a faulty cliff sensor.

I relocated the Roomba Discovery models’ diagnostic tests page and ran through the individual sensor diagnostics. On test 2, outer cliff sensors, only the starboard-most sensor worked properly; the outer port sensor showed “cliff” all the time. On test 3, both inner sensors showed “cliff” all the time.

Gathering more test materials and retesting, I found that only the outer starboard sensor’s IR LED was lighting my infrared sensor card (apparently no longer sold at Radio Shack, but apparently formerly part number 276-099 and/or 276-1099), and the cliff-sensor IR LEDs were dark. Further, shining the virtual wall’s IR LED beacon into the cliff sensors caused the diagnostic LEDs to flicker, indicating that the cliff-sensor IR detectors (phototransistors or photodiodes) were working properly, so the problem definitely seemed to be in the LEDs.
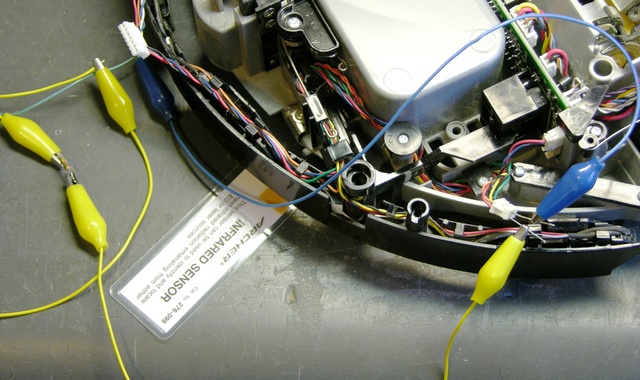
Testing Roomba Scheduler cliff sensor IR LEDs

All three of the dark LEDs individually checked good with the diode tester on my multimeter. Tracing the cliff sensors’ LEDs, I found that the three dark ones were all powered in a single series circuit, fed by the red (anode) and orange (cathode) wires in the top row of J24 at the port end of the main board.

My meter’s diode tester didn’t use a high enough voltage to overcome the forward voltage drop of the series string, so I hooked my bench power supply to a 1KΩ resistor and the series chain. All the LEDs now glowed on my IR sensor card, so the LEDs weren’t faulty (which I had assumed anyway) — the problem was with the driver.

Robot Reviews Forum and Q4 LED Driver

Searching online for advice, I quickly found this forum post titled “Cliff sensor failure apart from one” complaining of exactly the same problem. “Gordon,” a very knowledgeable contributor, indicated that the dark LEDs were all driven by the same transistor, Q4.

I found Q4 on the board and it was twisted, so I straightened it without particularly thinking. (This fact isn’t relevant yet. Just wait.)

Gordon indicated which MB test points correspond to which Q4 pins, provided an apparently reverse-engineered and incredibly helpful schematic of the cliff-sensor LED drive system, and indicated that the Q4 and Q37 bases should have a 1kHz square wave on them, with a corresponding signal on the collectors.

I put the scope on Q4 and its base was oscillating nicely, but its collector stayed high. This made me suspect a faulty Q4, so I quickly and cleanly desoldered it and checked it in my out-of-circuit transistor tester. The tester said it was good with a β of about 220, which wasn’t what I wanted to see. I wanted it to be broken.
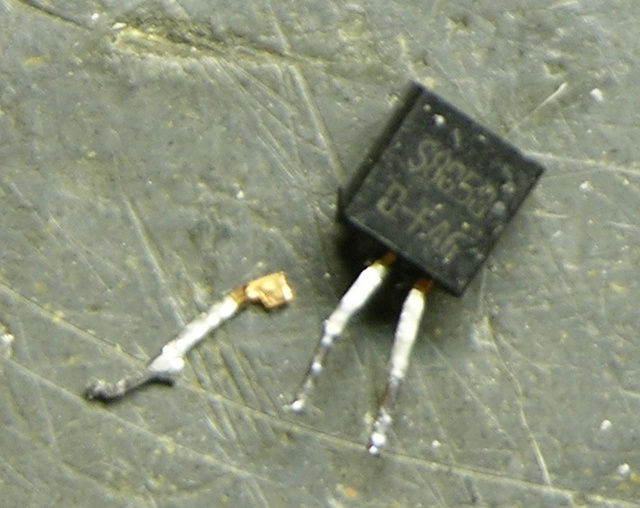
Transistor with detached leg

And then while I was straightening the leads and pondering what to do next, the emitter leg felt loose and I pulled it out with my fingers. Removed, it looked rather like a dessicated cricket leg you’d find in a corner.
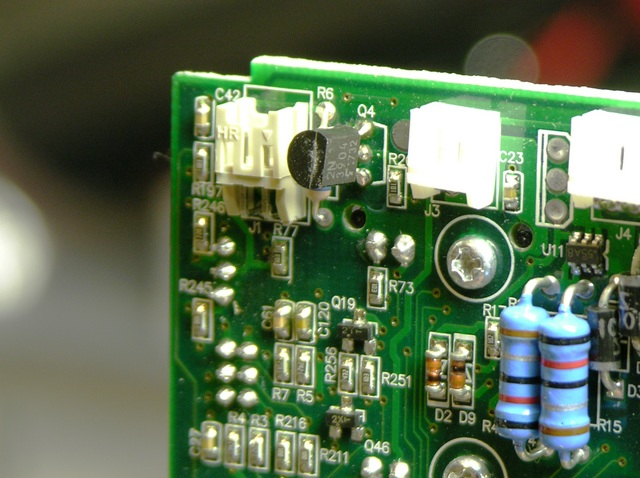
Roomba Scheduler with replacement cliff sensor LED drive transistor Q4

I don’t have SS8050s on hand (that I know of), but they’re all over the MB and appear to be used as general-purpose transistors. I found a 2N3904 with the same pinout in my parts bin (if you think all TO-92 transistors with the same part number have the same pinout, you haven’t shopped enough different manufacturers), tested about the same β, installed it, and the IR LEDs all glowed.

I could have pulled an SS8050 from my original MB, but (1) I wanted to keep it intact, and (2) I wanted to demonstrate that another transistor would work. And so it did!

Sweet, Sweet Success
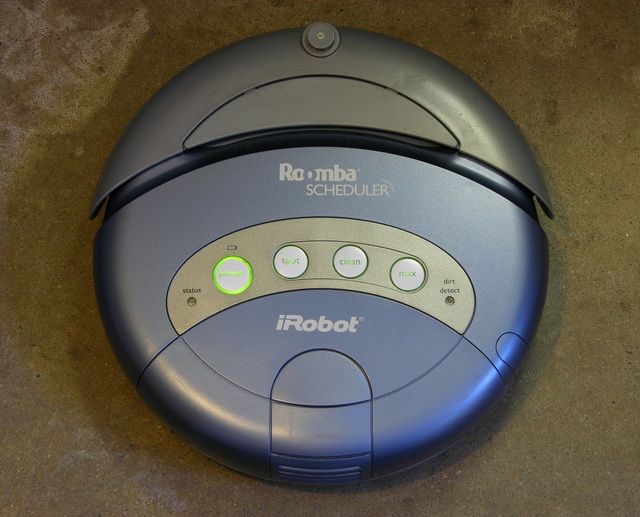
Roomba Scheduler powered up and ready to run

Roomba powered up again, but this time it didn’t burp (I mean “eh”) when I hit buttons, and it went straight into cleaning mode. Woo-hoo! I took it to the living room and let it clean, and it ran the course and picked up all the cat hair.

Today I emailed the eBay seller just to let him know what had happened. I wasn’t upset and I left him all positive feedback because the board he sold me fixed my problems within my abilities, plus I may have broken Q4 myself while straightening it, plus I had some fun tracing the problem. But I thought he should know what happened so he could check future boards more carefully for customers less fascinated by the process of repair.

He replied:

wow, yes you went above and beyond what I would expect. Thanks for helping out, i’m sorry you had to do so much.

sounds like the glass is half full with you.

There may be some truth to that.
Trying to Repair Roomba Scheduler

Monday, December 29th, 2008

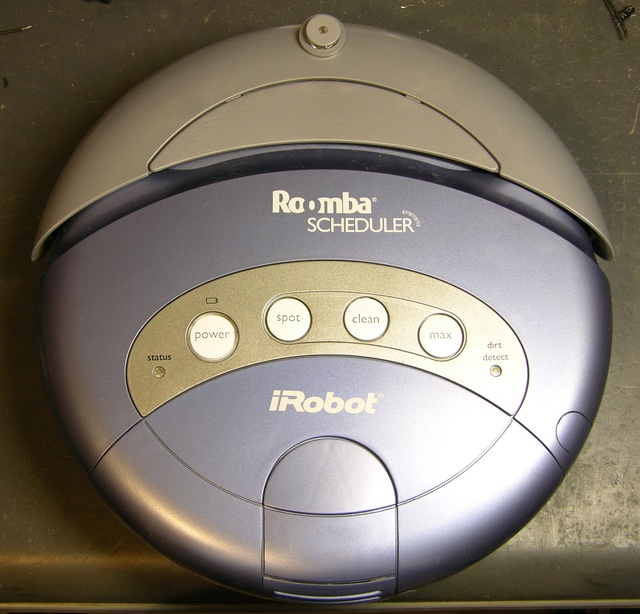
Roomba Scheduler

About two and a half years ago, I did something foolish in trusting the wiring instructions from a Roomba battery rebuild supplier and blew up my brand new Roomba Scheduler. Hasn’t worked since, because I wanted to see if I could find the problem and fix it myself before sending it back for factory service. Turns out I can’t (or at least haven’t), but the inside is interesting nevertheless.

Opening

Getting into the Scheduler is easier than getting into the first generation, mainly because it (almost) all comes apart with screws, instead of the (few) latching tabs in the original Roomba. These instructions on fixing the Roomba Discovery “Circle Dance” do a good job of showing the screw locations, although the site then goes on to describe processes specific to cleaning the wheels’ optical sensors that weren’t relevant to my problem.

The most important part that wasn’t obvious to me from the instructions is that the front bumper holds down the front edge of the top, so you must remove the bumper, even if you don’t need to work on the bumper area.

Guts and Wiring

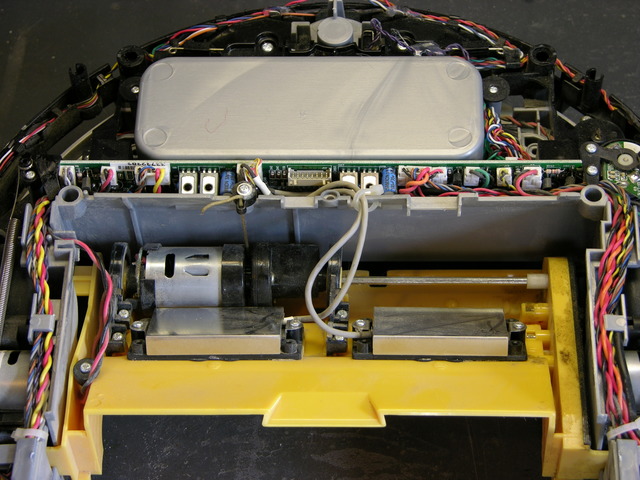
Roomba Scheduler interior, dustbin side

Once the cover is off, the inside looks pretty tidy. As on the original Roomba, there’s one main board sandwiched between the battery compartment and the brush deck, and all the sensors and motors cable up to it.

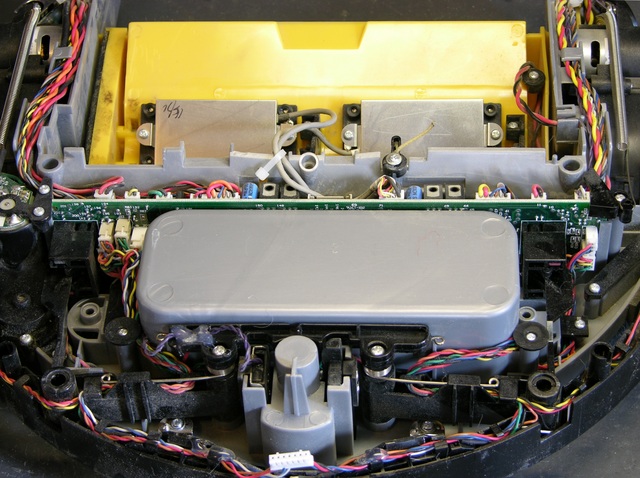
Roomba Scheduler interior, battery side

I had to pull all the cables before I could get the board out, and most of the cables had only one place they’d logically plug back in, but I still took pictures to make sure I’d know how to put it back together again, shown here for the convenience of all the king’s horses and all the king’s men who might be trying this themselves at home.

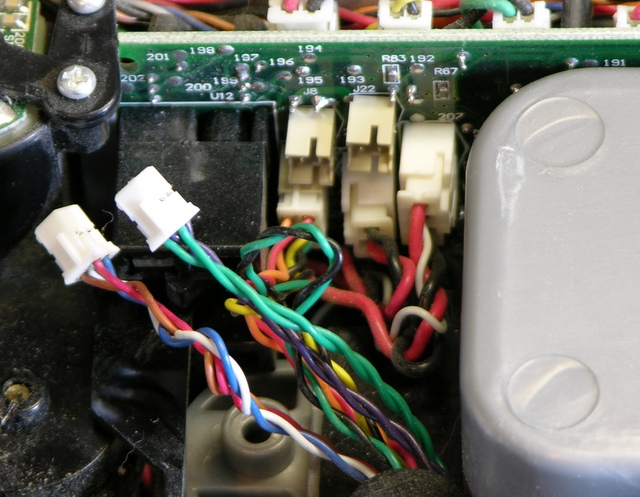
Roomba Scheduler wiring cluster

Having removed all the cables, there’s still an optointerruptor at each end with a bumper lever latched into it. It took some prying to get those loose — port (left when in motion, right when facing it to work on it) side first, then pull the board itself loose of the starboard side.

Main Board

Roomba Scheduler motherboard, component side

And here’s my main board, with nothing that I can see wrong. No scorched components,

Roomba Scheduler motherboard, solder side

no scorched traces. Foo. (The battery connector is J7 on the solder side, in case you want to trace out from there and try to debug this for me.)

With the component spacing so tight on the board, and no obviously damaged components to investigate first, I didn’t feel like bothering to plug all the connections back in and trace battery voltage while the board was out of its little home. So I gave up (for now, anyway), contacted iRobot to ask about repair, and reassembled the Scheduler.

Reassembly

The most noteworthy thing about reassembly is getting the bumper’s port-end (I think) mounting bosses back into their mating holes. Do those first, then the starboard (I think) end of the bumper, then ease the rest of the port end the rest of the way on. Whichever end it is, do the posts first.

Dirt Sensors

The last thing to mention while we’re in here anyway is the dirt detectors. The second or third generation of Roomba introduced dirt detectors that are supposed to be able to tell when Roomba is actually picking up dirt, so it can spend more time vacuuming that area. I think my dirt typically has a fairly uniform distribution on my floor; but maybe some folks like to send Roomba out to clean up knocked-over flowerpots and whatnot.

Anyway, I’ve always wondered how it could tell when there was dirt — some fancy-schmancy optical sensor pointing at the floor??? — and here’s the answer.

Roomba Scheduler dirt detector piezo sensors

Piezo sensors. Dead simple. Dirt hits them, ting-ting pting tang, and they translate the sound / force into an electrical signal that the Roomba interprets as the influx of dirt. Brilliant!

Next

iRobot promises to respond to a customer inquiry within one business day of receipt, so . . . they’re late. But we’ll see what they say about repair service and cost. I understand they also sometimes have returns and refurbs available for purchase; and at the right price, that could get me a new Scheduler and leave me a spare for parts.

Hm, looks like entire used Schedulers are running ~$100 on eBay, and I just found someone selling the circuit boards for $20 plus shipping. I can’t imagine iRobot touching that price for a factory repair, so it looks like I may be able to do this myself after all. Maybe get a spare Scheduler just for the fun of it, too.

Roomba Repair

Sunday, May 21st, 2006

I fixed my original Roomba this weekend, repairing a blown trace due to incorrect battery rebuild instructions, and learning other interesting things along the way.

Repairing Roomba Original