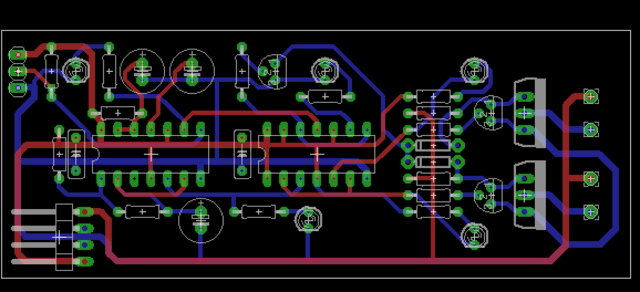
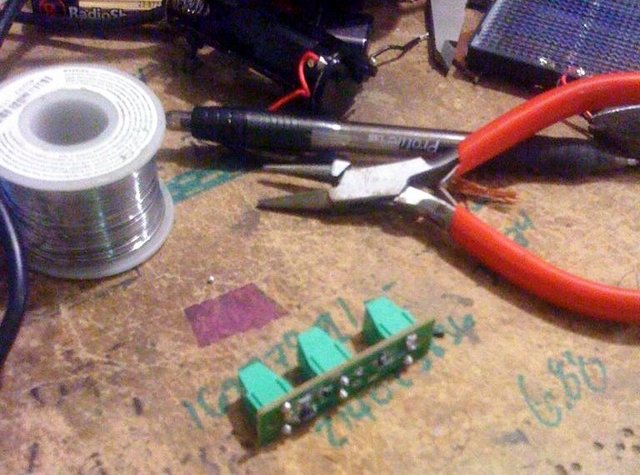
I’m working on a PC board layout for a circuit I’ve built and tested on the workbench. I enjoy board layout, but I was still delighted to be finished with the design. I printed out a copy, not to test whether all the components fit, but to stare at for a day and see whether I found anything that might need to be corrected.
Boy, did I.
In general, the first stage of laying out a PCB is placing external interface components — connectors, switches, potentiometers, etc. — followed closely by other large components and power supply traces. For me, the last stage of layout is doing a sanity check that the board will actually work (and be possible to assemble) in the real world.
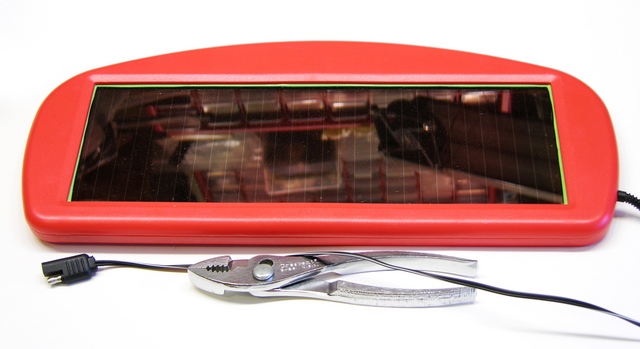
My dashboard solar charger is one of the more useful things I’ve bought from Harbor Freight. My van has some weak short-circuit and slowly drains the battery, and as I don’t use the van all that often, I was at risk of coming out to a completely drained battery. I now keep one of these on the dash and the battery is always topped off. When I first connected it, the van was sitting in shade and the (old) automotive battery measured 5V (!); after a week it was up to 9V and after another week it was fully charged. Now I don’t ever have to think about a drained battery again. At about $20 list and $15 on sale, it’s a steal.
The bus conversion project is languishing but not forgotten, and I’ve been wanting to put one of these chargers into the bus for the same reasons as I had for the van. The wiring situation is a little different, though — the bus has no cigarette lighter / power port, I’m intending to wire 12VDC throughout the bus with Anderson power pole connectors, and I might like to have multiple solar trickle chargers (even before I install larger solar panels on the roof).
The issue with multiple panels, and even with a single panel connected to a battery that will also be charged by the alternator, and even with a single panel that may still be connected to the battery at night, is that photovoltaic cells don’t like to have reverse voltage applied. The photovoltaic effect happens in a semiconductor junction, and although I can no longer find the reference I was reading the other day, I still know the cell doesn’t do well with a reverse voltage and should really be diode-protected.
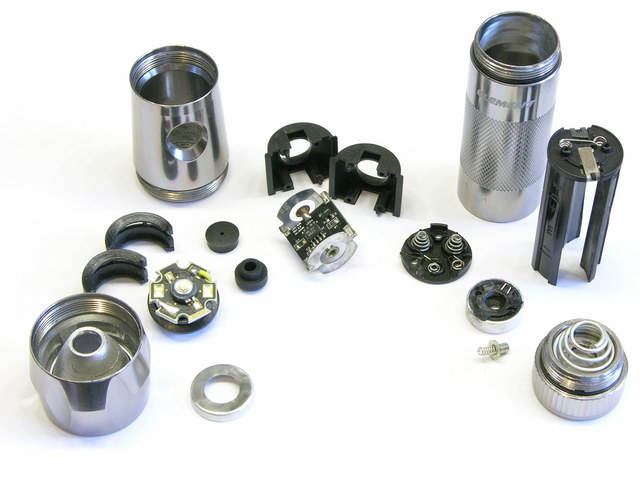
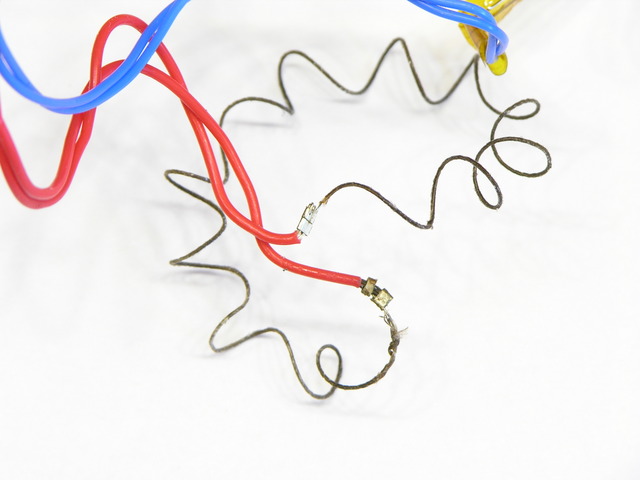
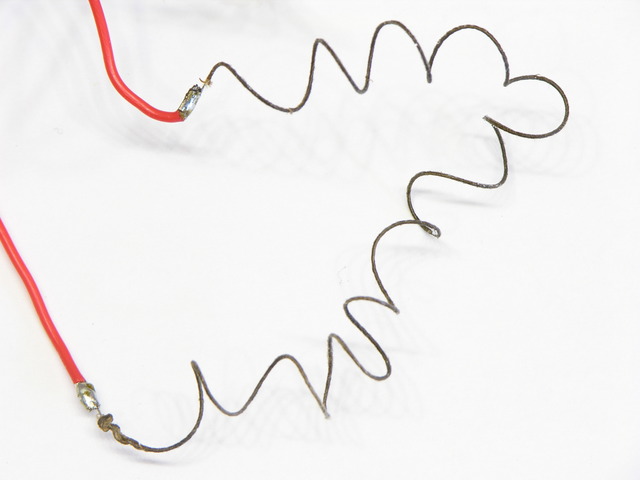
Because I wasn’t sure how much (if any) circuitry was in the panel and how much (if any) was in the automotive power plug connector, I had to take both apart to (A) make sure the panel would be diode-protected even after I chopped off the power plug and (B) see whether either held any relevant / useful circuitry.
While trying to print a replacement cap for a spray bottle (which I ultimately want to do in PLA, but that’s what broke my extruder and I’m working my way back up to it), sizing the cap properly for the bottle was complicated by the cap shrinking unevenly while the build was still in progress. I knew I needed to turn down the build platform temperature as soon as the first layer had adhered; but the cap was so thin that the platform didn’t lose heat fast enough to make much difference.
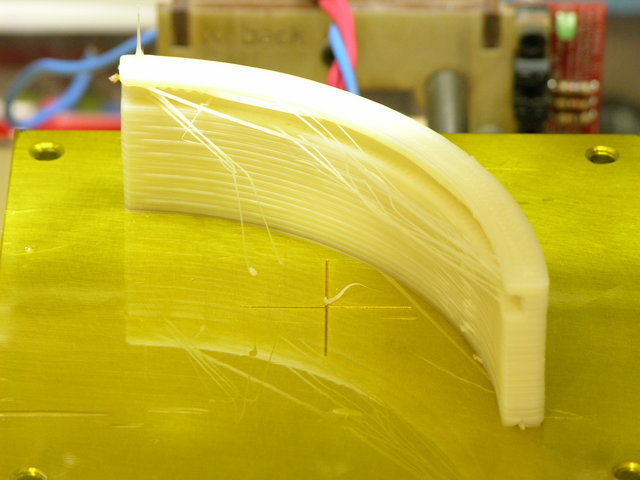
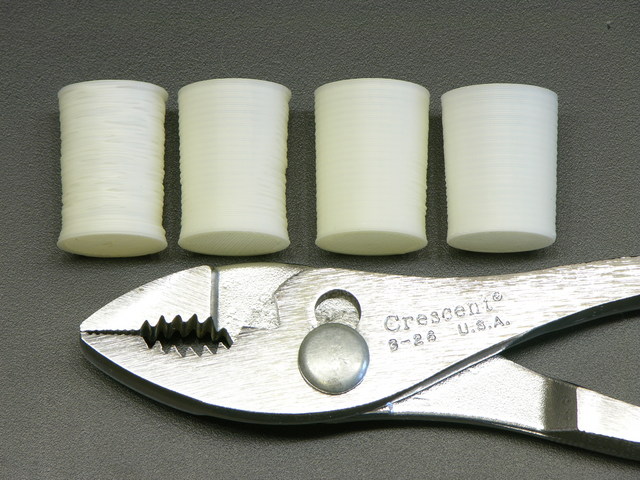
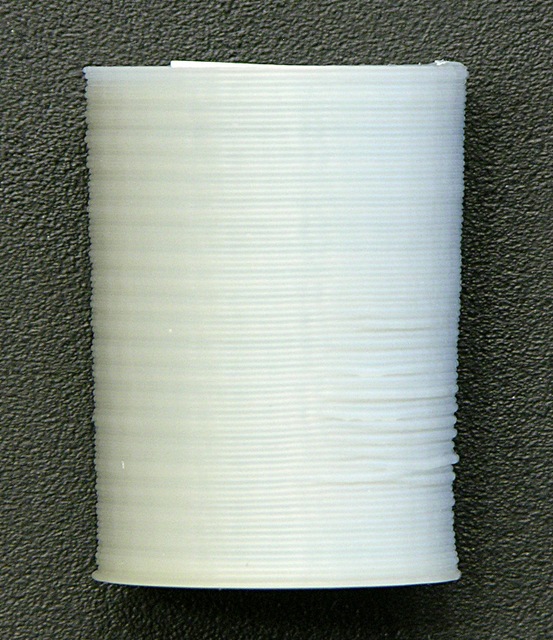
I connected a spare DC fan to my bench power supply, set it just outside the CupCake’s build chamber, and dialed it down until it barely spun. Holy schmoly! The left cap (you’ll need to click the image for the larger version), made with no cooling, looks like an art project woven out of twigs; the next one is extremely smooth on the side that was facing the fan — better than anything I’ve printed before!
The “seam” was on the side away from the fan and doesn’t look so as great as the fan side — but if one fan is good, two are surely better, right?
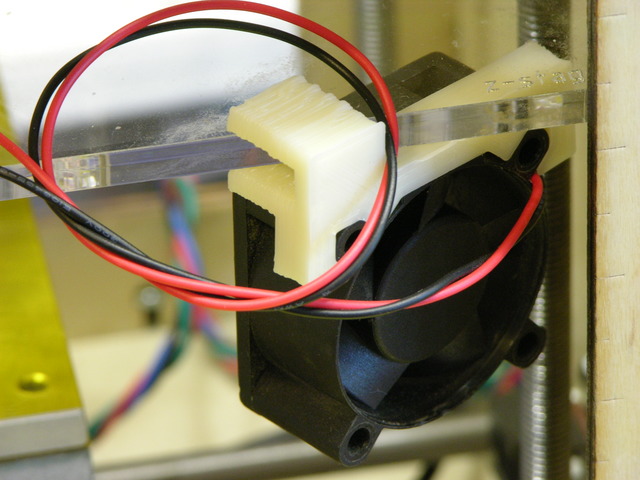
I designed and printed clips to press-fit onto a couple of 1.6″ DC fans I had sitting around (the clip is good enough to use but I have some dimensional tweaking to do before posting on Thingiverse) and positioned them at opposite corners of the build chamber, blowing around opposite sides of the object on the build platform. (Hey, I’m from Kansas. Vortices come naturally to us. Go buy a Vornado.)
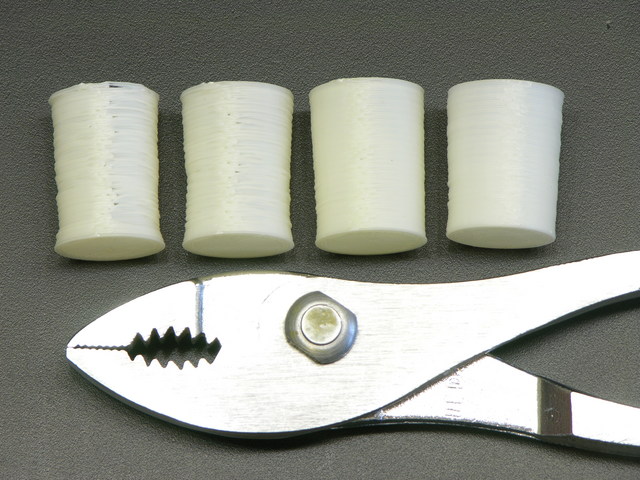
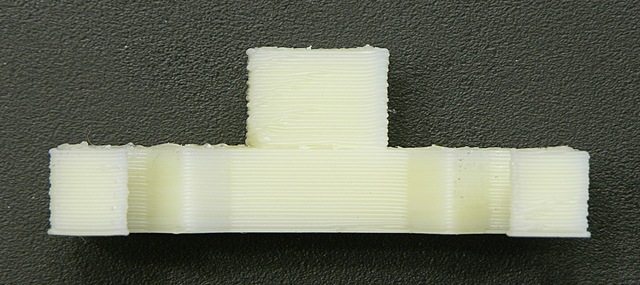
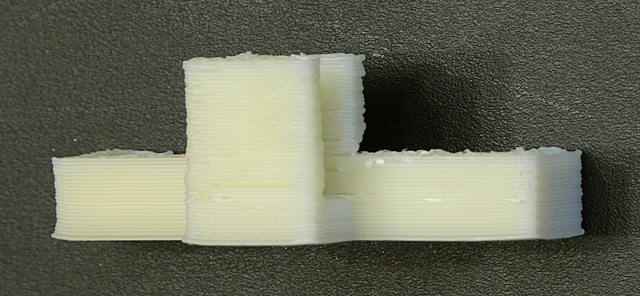
The third and fourth prints above are with two fans running, trying to find optimal airspeed to cool the deposited filament but not cool the nozzle so much that the ABS solidifies before exiting. (I filed down the seam on the fourth; it didn’t really print quite that well.) I think the ultimate combination may be an enclosed build chamber to raise the overall temperature and fans to cool the layer just printed.
Many CupCake, RepRap, and Hydraraptor operators have added cooling fans, but I don’t recall seeing dramatic before-and-after pictures. Based on what I’ve observed during mesmerizing hours of watching the CupCake print, it’s obvious why it helps — without active cooling, the previous layer is still molten enough that the soft extrusion being deposited by the nozzle still applies enough force to squish the previous layer out of the way in some random direction. It may have been deposited in the right place, but it’s not in the right place any more after the next layer moves it. With cooling, it stays put.
Z-Axis Wobble and Ooze
The CupCake carries the extruder up and down on a platform supported by four threaded rods. It’s a very economical design, but the rods are less precisely straight than Acme threaded rod and aren’t a perfect fit for the ID of the pulleys at the top. The combination of these factors results in the extruder platform swaying from side to side as it moves up and down. The effect is very visible during high-speed movement but still present during low-speed movement.
My printed objects are finally at a high-enough quality that I can see the Z-axis wobble represented in the perimeter of the object. The faint ripples visible toward the left edge — about four and a half filaments high — match the thread pitch of the threaded Z-axis rods and are caused by the extruder circling through the X-Y plane as it raises during the print.
This effect is well-known and is a solved problem. Thingiverse user “twotimes” has designed a wobble arrestor that adds rigid, smooth rods to the Z axis and new bushings attached to the extruder stage to follow them in a perfect vertical motion. It’s time!
The ripple is visible at the left end of the elevation view of this fan clip (and more obvious in person than in the photograph), but it is other imperfections that catch my eye. From the front, the bottom section looks very good, but the tower at the top (which once installed is the lower part of the extruder stage clip) has considerably more variation in filament position.
From the back, note the relatively high quality up to the top of the rearward extension for the clip — until which point the entire object has a single, contiguous perimeter. Above that level, the quality of the rear tower is much worse and the wall facing it is somewhat worse than below. The quality of the forward tower drops precipitously after the top of the main clip body.
Some of this may be due to the smaller cross-section leaving less time for the fan to cool the filament, but I place most of the responsibility on the filament drive in my extruder. It’s still the DC gearmotor design; the geartrain has a lot of backlash; and it’s not good at fast reversals. I’m optimistic that a stepper design will control the oozing, already improving the print quality, as well as making it practical to enable Skeinforge’s Cool plugin to pause printing between layers while the fan cools the just-extruded filament.
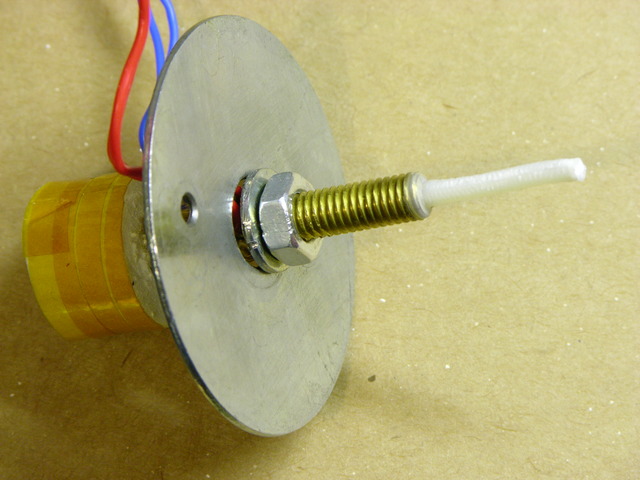
I had written about jamming my CupCake nozzle trying to extrude PLA and having to disassemble the whole nozzle to clean and rebuild it. I got new PTFE thermal barriers (the white Teflon® tube) from MakerBot, put things back together, and quickly jammed the heater with ABS, which I’d never done before.
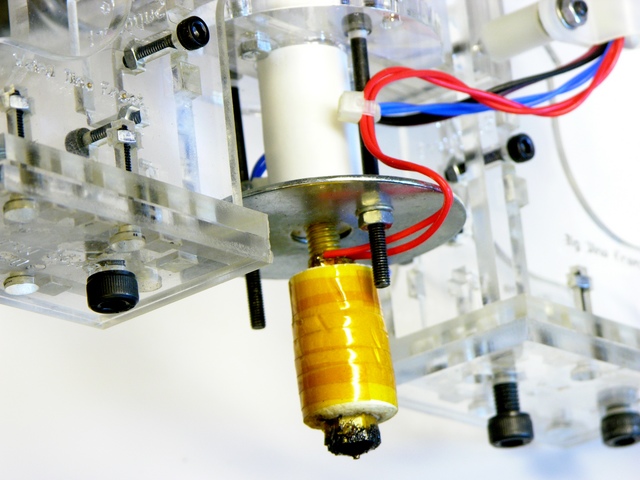
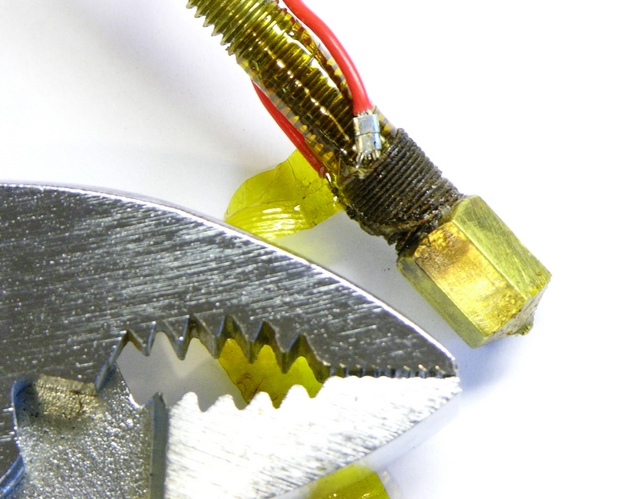
I conversed with Nop Head about the increased force required to push filament through the heater and he pointed me to the junction between the brass heater barrel and PTFE thermal barrier. It needs to be absolutely closed, and when reassembling I’d left a tiny gap into which the ABS expanded (covering the end of the brass in the photo), interfering with smooth flow of more ABS into the brass. He gave me this video link to a vivid demonstration of the phenomenon, in which he is attempting to push filament into a heater assembly that’s wide open at both ends:
He gave me the tip to reassemble the brass heater and PTFE barrier with a drill bit of the nominal hole diameter inserted. When the two are turned together as tightly as they should be, the PTFE will begin to deform and just barely begin to grip the drill bit.
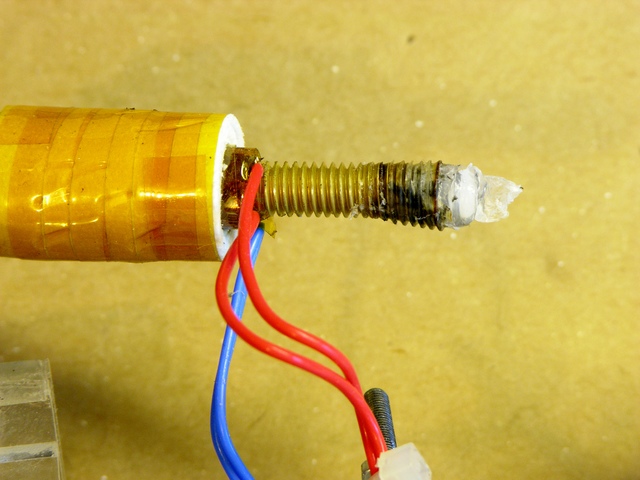
Believing the filament hole through the PTFE is metric and not owning metric drill bits, I figured the next best thing would be to use filament itself (which would be slightly undersized; but I could tighten until friction increased and then back off slightly). To my surprise, I couldn’t push filament through just the PTFE tube by itself.
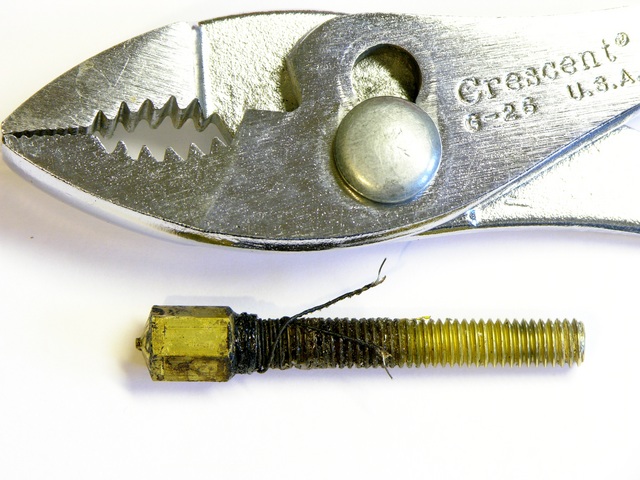
Upon inspection, I discovered swarf where the little filament hole from the top meets the larger heater hole from the bottom, and this swarf was interfering so much with the motion of the filament that even after forcing the filament end past it, I still had difficulty moving the ABS filament through the tube. No wonder the heater was jamming!
I reached into the large end of the hole with a rat-tail file and used its tip to push the swarf into the small hole, then filed it free by push-filing upwards into the hole. After cleaning the PTFE thoroughly, I reassembled the heater and fired it up again.
In the past, I’ve been able to hear my stock DC gearmotor slog down when the filament reaches a certain point inside the heater, and I’ve always assumed that was due to the constriction of the nozzle. Not so, as my motor no longer slogs, and instead merrily pushes filament through like chocolate sauce dribbling out of the corner of a topping pouch! I have to assume that my original PTFE barrier had the same problem (to a lesser extent) all along, and I wonder how many others out there do too.
Thermal Gradient and Glass Transition Phase
While rebuilding the heater, I initially thought that part of my original problem must have been the top of the brass getting hot enough to melt the plastic filament that close to the PTFE, as I had always pictured the filament melting somewhere inside the brass. I’ve also read about hot-end designs with a heater near the tip and a heatsink higher up to keep the feed area cool and the plastic solid while inside it.
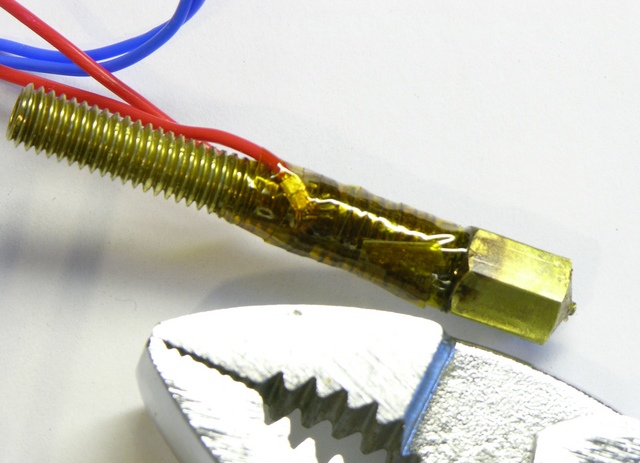
I thus rewound all of the nichrome near the nozzle end and thermally insulated only the tip, thinking the cooler area above would help keep the filament from melting within the PTFE.
Even though after deswarfing the PTFE, the extruder initially worked far better than it had before, it proved not to be as reliable as desired, and I did notice the filament feed beginning to bog down. I had an ongoing email conversation with Nop Head, and he gave me this fantastic explanation of the hot end, which I reprint here with his blessing:
Most of the temperature is dropped across the PTFE and the point where the plastic melts (when stationary) will be about half way between the end of the barrel and the top of the insulator. This is where it is most viscous, so it is is good that it is inside something very slippery.
Brass is about 1000 times more thermally conductive that PTFE, but the barrel has a much smaller cross sectional area, so the thermal resistances are not as far apart as that, but still considerably different.
When the filament is moving the melt point will be much closer to the top of the brass due to the time it takes to melt because ABS is also a very poor conductor of heat and has a high specific heat capacity.
It’s a shame PTFE is not transparent, as it would be a lot more obvious when things were not working.
I think when at rest the filament melts in the PTFE. When moving I think it only gets above the glass transition, so when there is a gap it expands into it and jams.
Well, heck! If that’s the way it works, it sounds like I want the brass heated evenly (at least in this Plastruder MK3 design) to keep the filament as soft as possible at the brass-PTFE junction.
I disassembled the heater yet again, this time rewinding the nichrome as evenly along the length of the barrel as possible and once again insulating the whole barrel. After reassembling, I haven’t noticed the feed motor bogging down as it was before.
Another heretofore unfinished old post, this one from January 2010:
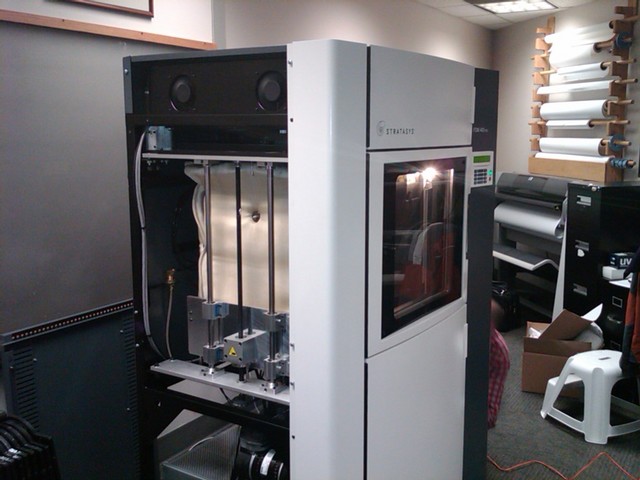
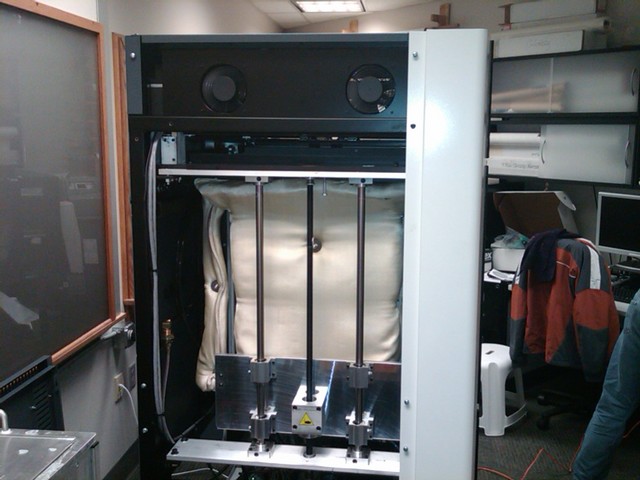
I was over at the aviation department last week and happened upon the installation of a new Stratasys rapid-prototyping machine.
It has a much larger build chamber than NIAR’s previous ABS machine — this one is something like 14″ x 14″ x 18″.
The case was open and I was intrigued by the thick blanket of insulation around the build chamber. I asked the installer if the whole chamber was heated and he said yes, to 80°C. Interesting point of reference, as RepRap / CupCake owners seem to have settled on 60°C as the standard temperature for heated build platforms.
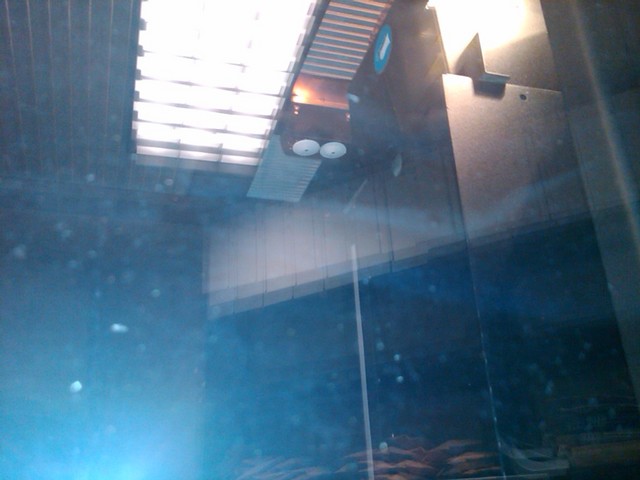
It was fairly dark inside the build chamber and I couldn’t get a great shot with my cell phone camera, but you can see the extrusion head with two nozzles for support and build material. I found it interesting how extremely broad and shallow the white nozzle cones are — maybe it helps prevent snags?
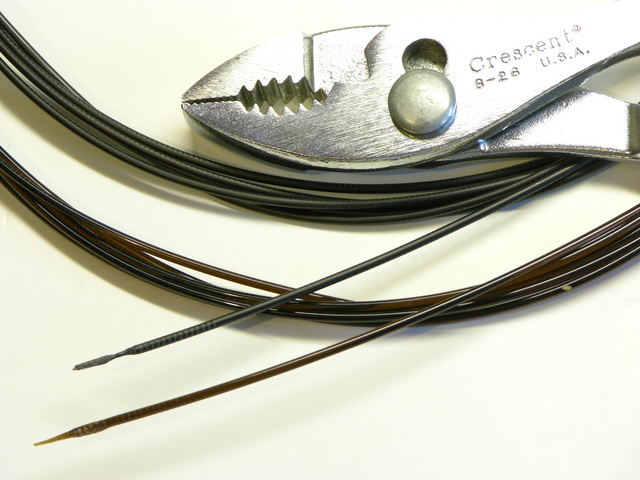
With the lab manager’s blessing, I fished two filament strands out of the trash. The upper, black filament is ABS; the lower, translucent brown filament is a dissolvable support material that apparently washes out in an agitated hot water and detergent bath. Wish I knew exactly what it was!
I measure the diameter at .070″ ± .001″ ≈ 1.778mm ≈ 1.75mm ≈ .069″, so it looks like they’re using 1.75mm filament. The stretched section on the end is recognizable as having been in the hot end and then backed out.
Note the toothmarks all the length of each filament (about 3m), suggesting that either something is pushing the filament from that far back or (more likely) the hot end has a quick-release for cleaning and this filament was run through the machine after removing the hot end.
I got a roll of PLA to try making some clear objects on the CupCake. I had read on the MakerBot wiki about the techniques for and challenges of printing PLA but still had trouble feeding PLA into the Plastruder MK3 and chasing out the ABS that I’d been using.
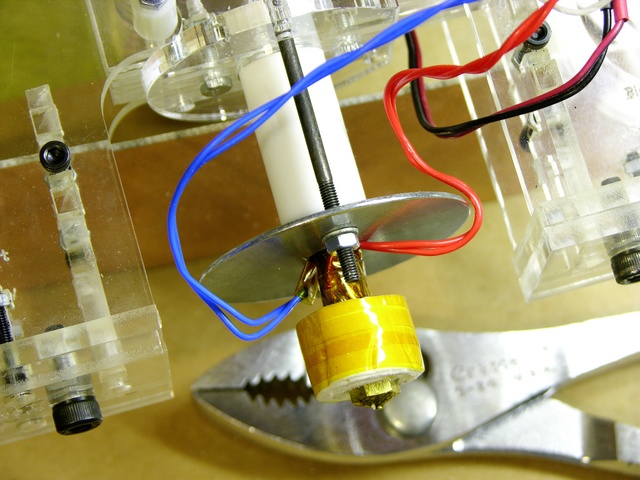
When feeding in the PLA, ABS came out for a while and then things stopped. Something happened inside the PTFE (Teflon) thermal barrier and the brass heater barrel was pushed out the bottom.
Later kits have a nut between the PTFE barrier and the metal washer so the long black bolts pulling on the washer in turn pull on the nut which has a stronger grip on the threads than the PTFE, dramatically reducing the risk of the brass barrel slipping out of the PTFE barrier and dramatically increasing the risk of cracking the acrylic retainer at the top. It’s recommended to replace it with a metal retainer.
Today I had time to disassemble the Plastruder and unthread the heater barrel from the PTFE barrier. Looks like the PLA melted, the PTFE got warm and softened, the PLA oozed around the heater barrel, and then the PLA solidified and the barrel was pushed out the end of the softened PTFE.
I chipped the hardened PLA off the end, then searched for a solvent that would dissolve the PLA out of the barrel. I was surprised to find no information online (I do not assert that there isn’t any but merely that I didn’t find it) and tried acetone. During the time I waited, it didn’t dissolve the PLA completely, but it did soften it enough to scrape it out of the threads with a wire brush and goop it out of the barrel with a drill bit.
Since something in the thermal insulation had been previously damaged by deliberate immersion in water, I ended up deciding to peel apart the whole heater assembly. I suspect the water-soaked kapton tape adhesive closest to the nichrome heater is what scorched and I still have faith in the magical powers of kapton. I just know its weakness now.
On the bright side, I get to rebuild my heater from scratch and make it beautiful again.
On the dim side, I need to replace the PTFE barrier, which is swollen beyond even making contact with the brass threads, and the ceramic insulation that wrapped the heater, which was no longer pristine. I see that the MakerBot store has them in stock and affordable, and I reckon I’ll order them this week unless I hear a brilliant alternative first. The nichrome wire’s fiberglass insulation looks and feels intact — I think it’s saturated with scorch from the kapton rather than being damaged itself — but I’ll probably order more of it too.
Anyone successfully using PLA, I’d love to hear what temperature works well for you and what technique you use for changing from ABS to PLA.
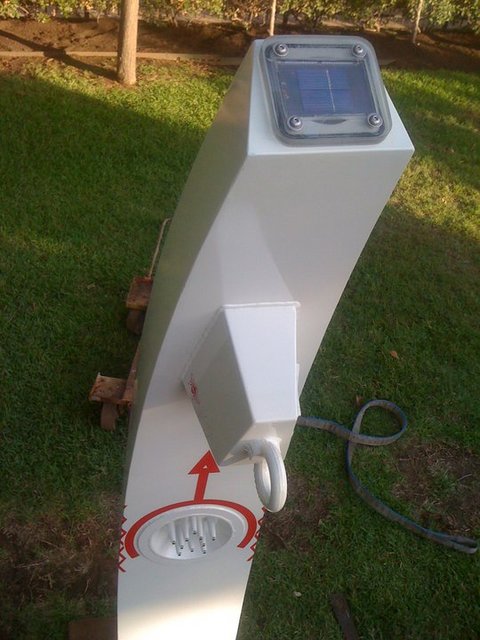
He had in mind to continue a series of his sculptures based on the form of a fishing lure but wanted to enhance this sculpture with one or more LEDs, preferably that would come on only at night. We discussed a wide variety of options that we hope to develop for another installation in the future; but in the end, in the interest of time for this project, Steve found control modules that flash up to five LEDs at random and installed them behind a set of cones protruding from a recessed panel.
He asked how to make the LEDs turn on at night and also wondered whether he could power them for a year from a primary battery or whether he should use rechargeables.
About seven years ago, I had come into possession of some discarded solar yard lights, and out of curiosity had reverse-engineered their charging and control circuits. Since yard lights accomplish both functions — charging and switching — I figured the circuit would be perfect for the sculpture. I was able to find one and instruct Steve how to modify it for his needs.
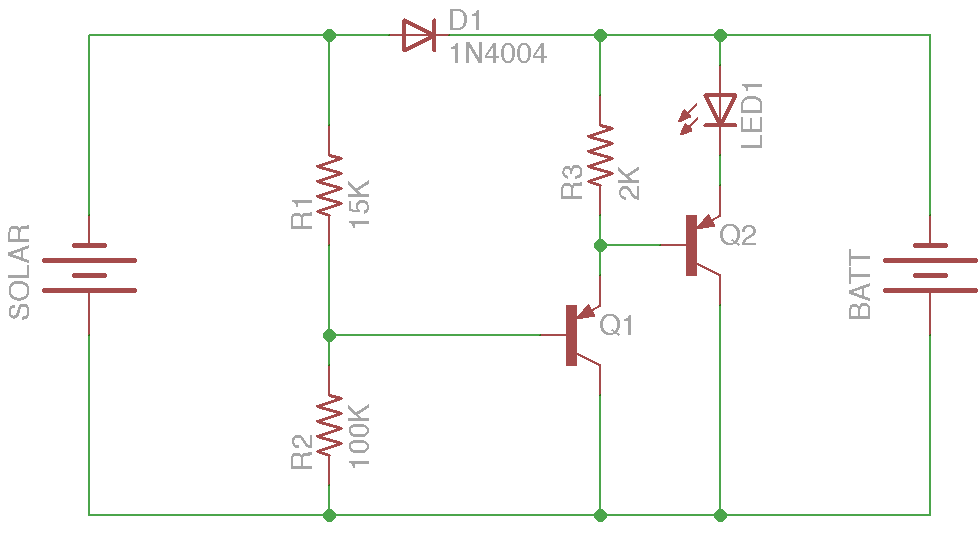
The circuit is very simple and I find it rather elegant. During the day, the solar panel assembly (left — for want of a proper schematic symbol, I just drew another battery) charges two AA cells through a diode that prevents the battery from damaging the panel with reverse voltage at night. Additionally, through the R1 – R2 voltage divider, the solar panel pulls up the base of Q1, switching it off and allowing R3 to pull up the base of Q2, switching it off and switching off the load LED1.
At night, the panel’s output approaches 0V and R2 pulls down Q1‘s base, causing Q1 to conduct and pull down Q2‘s base (in a Darlington-like arrangement — I don’t know whether it’s still considered a proper Darlington with R3 pulling up the Q1 emitter – Q2 base connection), switching on Q2 and LED1. In fact, depending on the panel’s exact voltage, the load may switch on even before full darkness, and R1 – R2 can be tweaked to tune the turn-on point.
Steve removed the LED from the control board and replaced it and the fly wires for the solar panel and battery with screw-terminal connectors for ease of installation inside the sculpture. He bought a new solar panel with a higher output voltage to charge the higher-voltage battery for the white LEDs he wanted to use (the yellow LEDs in my yard lights didn’t require as high a forward voltage) and milled a Lexan cover for it to protect the panel from hail, with an O-ring groove to protect it from rain as well.
With higher battery and solar panel voltages, Steve indicated the load was turning on before the ambient light got as dark as he wanted, so I told him how to locate R1 and replace it with fly wires to a 100K pot. After the swap, he said he was able to tune it perfectly and he was delighted.
I’ve not had a chance to visit the sculpture garden and probably won’t while Lure 22 is installed. If anyone’s in the area, I’d love to hear from you how well it’s working and how well the electronics hold up over the course of a year outdoors.
Just found this unpublished draft from October. I had received a GXTV2-48V battery expansion cabinet for my Liebert GXT2-2000RT120 UPS and wanted to see what was inside.
Eight sealed lead-acid batteries are bolted down and connected through a circuit breaker / switch to the two input/output jacks in parallel.
The cable to daisy-chain the battery expansion cabinets to the UPS is … substantial.
Installed in the basement server rack (bottom) and connected to the UPS. Sure wish I had a bezel for the battery cage.
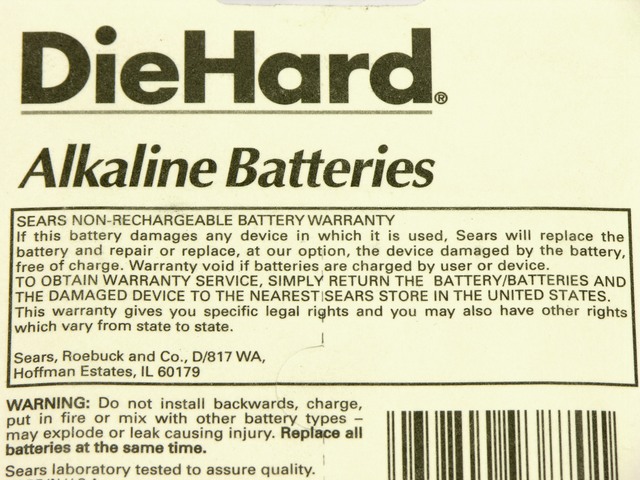
A couple of years ago, I received this automotive USB-connector power adapter as a promotion at a conference. I use it to keep my iPod nano charged in the car, but I’ve noticed it doesn’t charge my Blackberry well. To be precise, it doesn’t charge my Blackberry. In fact, I’ve never been clear whether it even slows the rate of discharge, and sometimes it seems like it speeds it. The Blackberry shows the lightning bolt charging symbol (The charging symbol is a lightning bolt, srsly? Ben Franklin is personally charging my phone?) but nobody’s home.
Note that I don’t blame the vendor whose logo happens to be on it — I’m sure they didn’t manufacture it.
After driving two and a half hours a week ago starting with a half charge on my BlackBerry, plugging it in midway through the trip, and arriving to have the BlackBerry finally shut off its radio due to depleted charge; and due to being in the presence of Cort; I decided it was time to see why the adapter couldn’t provide enough charge for the BlackBerry.
I had previously noted the shrinking of the first few layers of a build on my CupCake and attributed it to the ABS shrinking too rapidly after extrusion because the room and the build chamber weren’t terribly warm. Although I’d leaned things against all of the CupCake’s windows so the heated build platform warmed the whole chamber, I thought that too much heat was leaking out when I prepped the print and removed the pre-print test extrusion and that it took a number of layers to heat the interior back up to non-shrinking temperature.
I figured I could retain more heat inside if I didn’t have to move the front “curtain” to remove the test extrusion, so I went to The Yard and picked up a big pair of Kelly forceps. Since I wanted to use them as giant tweezers, I Dremeled off the locking mechanism, leaving myself with a big pair of plain ol’ forceps.
I heated the build platform and the now-more-enclosed chamber for half an hour (longer than the time it takes to print past the warped area), then sneaked the forceps in and snaked out the test extrusion. Whaddya know — the build warped in just the same way as before.
Hm.
I don’t yet have my build platform’s thermistor connected, so I’ve been running the heater open-loop using a lab power supply to adjust the temperature via current regulation. I remembered a while back when I had it so hot that the bottom half inch of my objects stayed melty-squishy while being built … and although I no longer run it that hot, I’ve been sloppy lately about turning down the current once the first layer is adhered to the platform.
Maybe, I thinks, maybe the first few layers are too warm and pliable and get compressed as the layers above them cool and shrink. I uncover all the CupCake’s windows, start a print, and dial the heated platform current down from 2.7A to 1.8A after the first layer sticks down. I get perfectly straight walls, so I’m finally on the right track and it’s less heat that I need, not more –
but whatever temperature 1.8A delivers isn’t enough to keep the object stuck to the kaptan tape and the bracket I’m building pops loose when it’s almost finished, naturally when I’m in another room, and the last half mile of extrusion doesn’t adhere particularly well to the bracket when the bracket is no longer on the platform.
2.7A for first-layer adhesion, 2.2A after first layer, slight shrinkage, no popping loose from the platform. Now to the point of tweaking for diminishing returns. I should maybe add a fan pointed at the platform like other folks have done, although that has its own dangers (easy to cool the platform too much).
I’m eager to get the thermistor wired up (heater PCB v1.1 will have less restrictive connector spacing); translate these currents into temperatures; and connect the heater and thermistor to the CupCake for closed-loop, PID control. I will not abide the clickety-clack of relays, so I’ll find some big FETs.